crwdns2933423:0crwdne2933423:0

Google Pixel 9に新しい背面ガラスの接着剤をつける方法

crwdns2936315:0crwdne2936315:0
crwdns2936323:0crwdne2936323:0
crwdns2931653:04crwdne2931653:0
How to Apply New Back Glass Adhesive in Your Google Pixel 9: crwdns2935265:00crwdnd2935265:01crwdnd2935265:03crwdne2935265:0 How to Apply New Back Glass Adhesive in Your Google Pixel 9: crwdns2935265:00crwdnd2935265:02crwdnd2935265:03crwdne2935265:0 How to Apply New Back Glass Adhesive in Your Google Pixel 9: crwdns2935265:00crwdnd2935265:03crwdnd2935265:03crwdne2935265:0
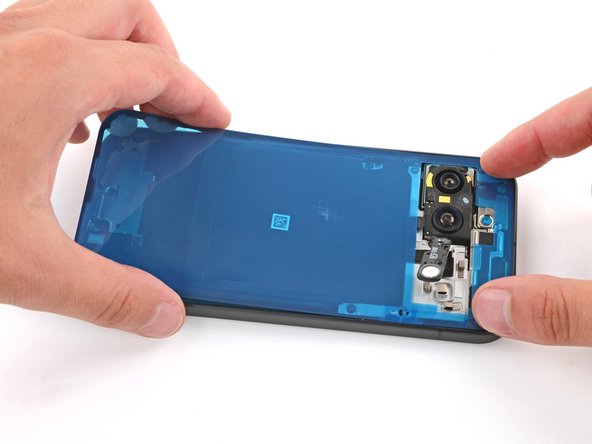
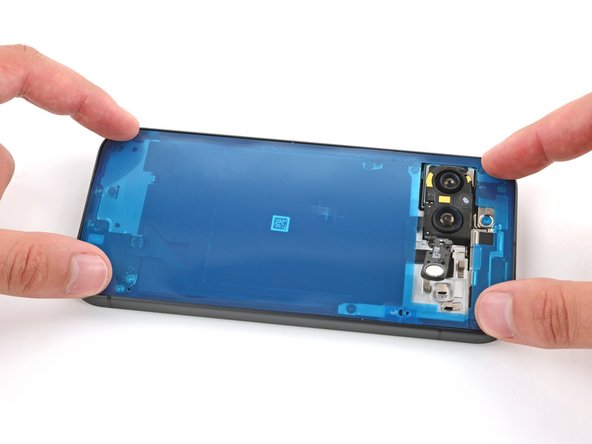
  • Be very careful during this step! Once the adhesive sticks to the frame, you won't be able to reposition it. If the adhesive gets applied incorrectly, you'll have to start over with a new one.

  • Carefully place the adhesive onto the frame so the large cutout goes over the cameras. Use the frame's lip to help position the sheet.

この手順は特に慎重に行ってください。一度接着剤がフレームについてしまうと、はがして位置を調整することができなくなります。もし間違った場所についたり、形がゆがんだりしたら手順1からやり直す必要があります。

接着剤の四角形の切り込みがカメラの外周とぴったり合うように、ゆっくりと接着剤をフレームにつけます。端末のフレームを見ながら位置を調整してください。

crwdns2944171:0crwdnd2944171:0crwdnd2944171:0crwdnd2944171:0crwdne2944171:0