crwdns2933423:0crwdne2933423:0

Google Pixel 9 Pro XL バッテリーの交換

crwdns2936315:0crwdne2936315:0
crwdns2936323:0crwdne2936323:0
crwdns2931653:02crwdne2931653:0
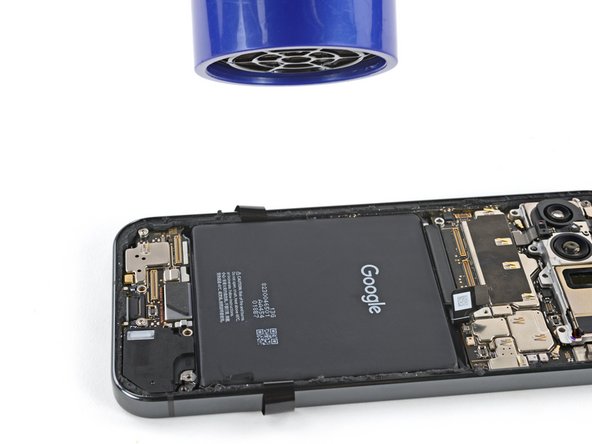
Google Pixel 9 Pro XL Battery Replacement, Heat the battery: crwdns2935265:00crwdnd2935265:01crwdnd2935265:03crwdne2935265:0 Google Pixel 9 Pro XL Battery Replacement, Heat the battery: crwdns2935265:00crwdnd2935265:02crwdnd2935265:03crwdne2935265:0 Google Pixel 9 Pro XL Battery Replacement, Heat the battery: crwdns2935265:00crwdnd2935265:03crwdnd2935265:03crwdne2935265:0
Heat the battery
  • Before starting the battery removal process, carefully read the next three steps. The pull tabs are most effective immediately after heating the battery, so you'll want to know exactly what to do before starting the process.

  • Strong strips of adhesive secure the battery to the frame. Heating the battery will soften the adhesive, making it easier to separate.

  • Use a hair dryer on High heat and Low speed settings to heat the battery for three minutes, while holding the hair dryer about three inches from the battery. Try to evenly spread the heat over the entire surface of the battery.

  • Alternatively, you can use a heat mat at 70 °C (158 °F) with your phone placed screen side down for 10 minutes.

バッテリーの取り外し作業を始める前に、次の3つの手順をよく読んでください。プルタブはバッテリーを加熱した直後が最も効果的なので、作業を始める前に先にすべきことを正確に知っておいてください。

バッテリーは強力な接着剤でフレームに固定されています。バッテリーを加熱すると接着剤が柔らかくなり、分離しやすくなります。

ドライヤーを使って、バッテリーから3センチほど離した状態で、高熱低速の設定で3分間バッテリーを加熱します。バッテリーの表面全体に均等に熱が行き渡るようにします。

または、70℃(158°F)のヒートマットを使って、デバイスのスクリーンを下にして10分間加熱する方法もあります。

crwdns2944171:0crwdnd2944171:0crwdnd2944171:0crwdnd2944171:0crwdne2944171:0