crwdns2933423:0crwdne2933423:0

Google Pixel 9 Pro Drahtlos-Ladeeinheit tauschen

crwdns2931529:0crwdnd2931529:0crwdnd2931529:0crwdnd2931529:010crwdnd2931529:0crwdne2931529:0

crwdns2935425:01crwdne2935425:0

crwdns2936315:0crwdne2936315:0
crwdns2936319:0crwdne2936319:0
crwdns2931653:01crwdne2931653:0
Google Pixel 9 Pro Wireless Charging Assembly Replacement, Prop up the rear cover: crwdns2935265:00crwdnd2935265:01crwdnd2935265:03crwdne2935265:0 Google Pixel 9 Pro Wireless Charging Assembly Replacement, Prop up the rear cover: crwdns2935265:00crwdnd2935265:02crwdnd2935265:03crwdne2935265:0 Google Pixel 9 Pro Wireless Charging Assembly Replacement, Prop up the rear cover: crwdns2935265:00crwdnd2935265:03crwdnd2935265:03crwdne2935265:0
Prop up the rear cover
  • Don't try to fully remove the rear cover yet, as a ribbon cable on the right edge connects it to the phone.

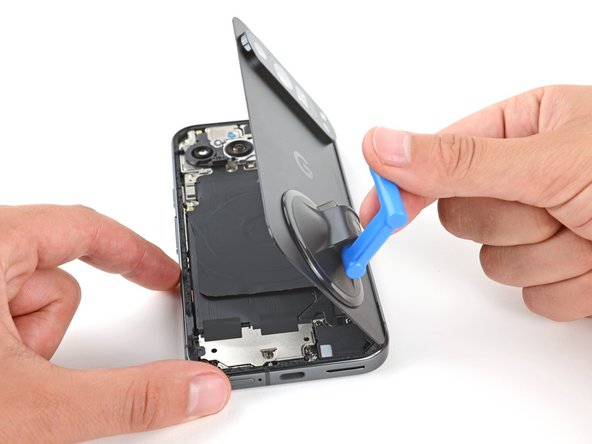
  • Use the suction handle to lift the left edge of the rear cover and swing it over the right edge, like opening the cover of a book.

  • If you're having trouble, check the perimeter for any remaining adhesive and use your opening pick to separate it.

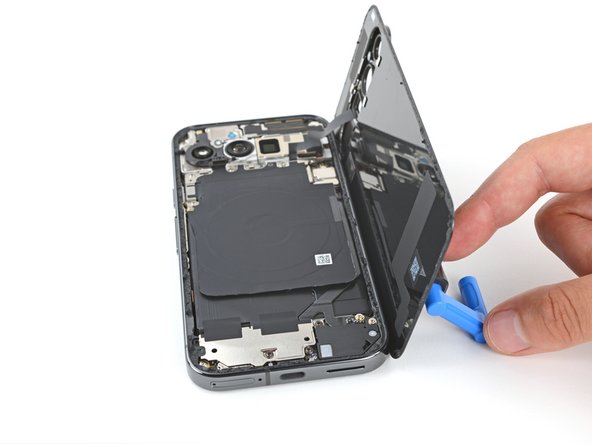
  • Prop up the rear cover with the suction handle so you can access the ribbon cable near the top right corner.

Entferne die Rückseite noch nicht ganz, sie ist noch mit einem Flachbandkabel an der rechten Seite am Smartphone angeschlossen.

Hebe die Rückseite an der linken Seite mit einem Saugheber an und klappe sie über die rechte Kante, so wie ein Buch aufgeschlagen wird.

Wenn das nicht leicht geht, dann kontrolliere die Kanten auf Klebstoffreste. Beseitige sie mit dem Plektrum.

Stütze die Rückseite auf den Saugheber ab, so dass du an das Flachbandkabel nahe der rechten oberen Ecke herankommst.

crwdns2944171:0crwdnd2944171:0crwdnd2944171:0crwdnd2944171:0crwdne2944171:0