crwdns2933423:0crwdne2933423:0

ロジックボードの取り外し(リアカメラ)

crwdns2931527:0crwdnd2931527:0crwdnd2931527:0crwdnd2931527:0crwdne2931527:0

crwdns2936315:0crwdne2936315:0
crwdns2936323:0crwdne2936323:0
crwdns2931653:07crwdne2931653:0
Logic Board Removal (Rear Cameras), Remove the logic board: crwdns2935265:00crwdnd2935265:01crwdnd2935265:03crwdne2935265:0 Logic Board Removal (Rear Cameras), Remove the logic board: crwdns2935265:00crwdnd2935265:02crwdnd2935265:03crwdne2935265:0 Logic Board Removal (Rear Cameras), Remove the logic board: crwdns2935265:00crwdnd2935265:03crwdnd2935265:03crwdne2935265:0
Remove the logic board
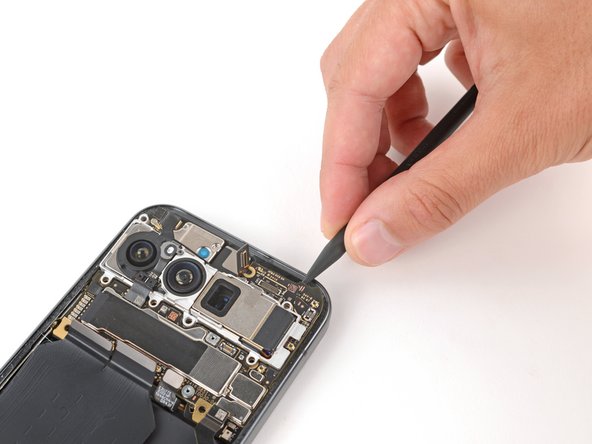
  • Use a spudger to pry up the top edge of the logic board until you can grip it with your fingers.

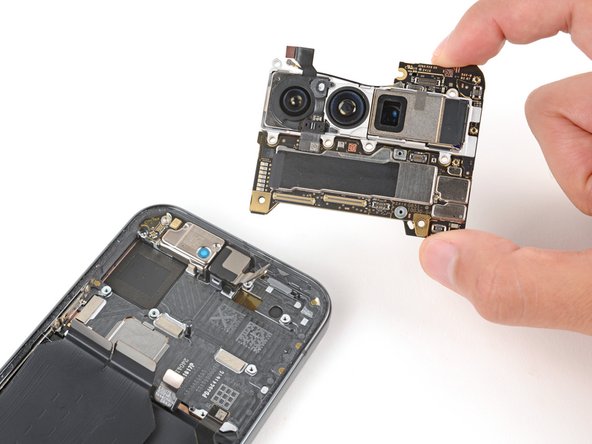
  • Grip the right side of the logic board and carefully remove it, being careful that no cables get snagged (one front facing camera cable and four cables along the bottom edge).

  • During reassembly, hold the front facing camera cable out of the way and lower the logic board into place, making sure the four cables along the bottom edge don't get trapped underneath.

ロジックボードの上端をスパッジャーで指で握れるまでこじ開けます。

ロジックボードの右側をつかみ、ケーブルが引っかからないように注意しながら慎重に取り外します(正面を向いたカメラケーブル1本と、下端に沿ったケーブル4本)。

再組み立ての際、正面のカメラケーブルを邪魔にならないように持ち、下端に沿った4本のケーブルが下に引っかからないように注意しながら、ロジックボードを所定の位置に下げます。

crwdns2944171:0crwdnd2944171:0crwdnd2944171:0crwdnd2944171:0crwdne2944171:0