crwdns2933423:0crwdne2933423:0

Logic Board entfernen (Rückkameras)

crwdns2931527:0crwdnd2931527:0crwdnd2931527:0crwdnd2931527:0crwdne2931527:0

crwdns2936315:0crwdne2936315:0
crwdns2936319:0crwdne2936319:0
crwdns2931653:07crwdne2931653:0
Logic Board Removal (Rear Cameras), Remove the logic board: crwdns2935265:00crwdnd2935265:01crwdnd2935265:03crwdne2935265:0 Logic Board Removal (Rear Cameras), Remove the logic board: crwdns2935265:00crwdnd2935265:02crwdnd2935265:03crwdne2935265:0 Logic Board Removal (Rear Cameras), Remove the logic board: crwdns2935265:00crwdnd2935265:03crwdnd2935265:03crwdne2935265:0
Remove the logic board
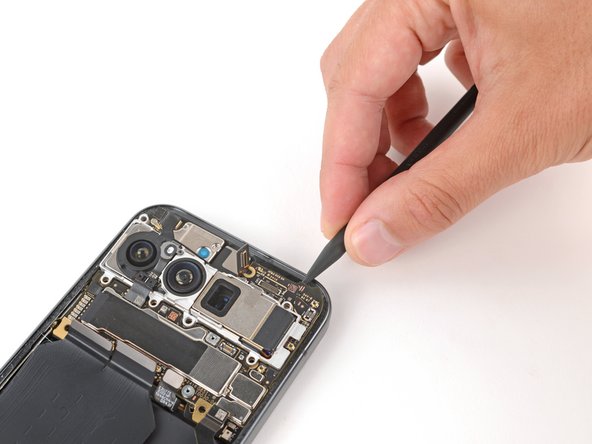
  • Use a spudger to pry up the top edge of the logic board until you can grip it with your fingers.

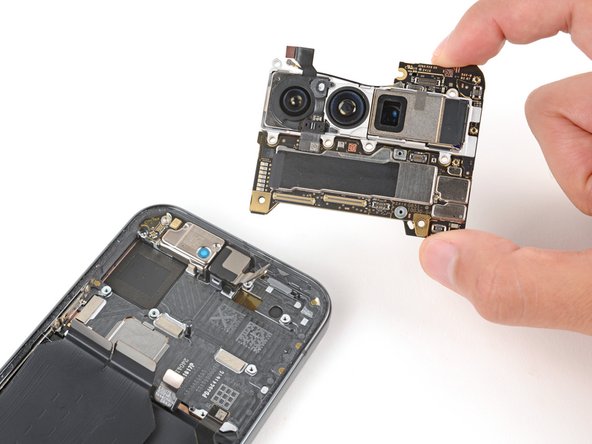
  • Grip the right side of the logic board and carefully remove it, being careful that no cables get snagged (one front facing camera cable and four cables along the bottom edge).

  • During reassembly, hold the front facing camera cable out of the way and lower the logic board into place, making sure the four cables along the bottom edge don't get trapped underneath.

Heble das Logic Board mit dem Spudger an der Oberkante hoch, bis du es mit den Fingern greifen kannst.

Fasse das Logic Board an der rechten Seite an und entferne es. Achte darauf, dass es sich nicht an der Frontkamera und Akkukabeln schabt.

Halte das Kabel zur Frontkamera beim Zusammenbau aus dem Weg und senke das Logic Board an seinen Platz ab.

crwdns2944171:0crwdnd2944171:0crwdnd2944171:0crwdnd2944171:0crwdne2944171:0