crwdns2933423:0crwdne2933423:0

De eenvoudige Atari 1050-schijfstation conversie naar DC

crwdns2936315:0crwdne2936315:0
crwdns2936313:0crwdne2936313:0
crwdns2931653:04crwdne2931653:0
The simple Atari 1050 Disk Drive Conversion to DC, Place the first jumper: crwdns2935265:00crwdnd2935265:01crwdnd2935265:03crwdne2935265:0 The simple Atari 1050 Disk Drive Conversion to DC, Place the first jumper: crwdns2935265:00crwdnd2935265:02crwdnd2935265:03crwdne2935265:0 The simple Atari 1050 Disk Drive Conversion to DC, Place the first jumper: crwdns2935265:00crwdnd2935265:03crwdnd2935265:03crwdne2935265:0
Place the first jumper
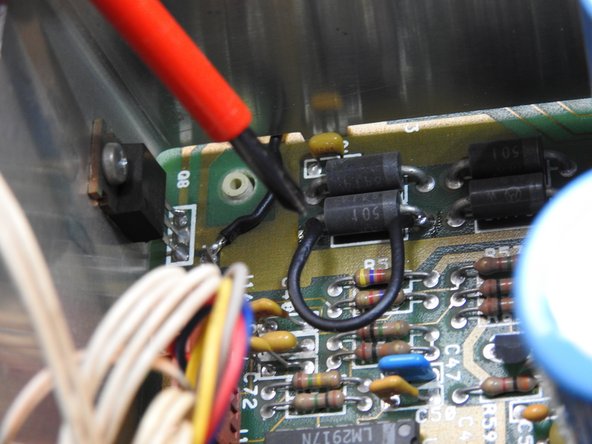
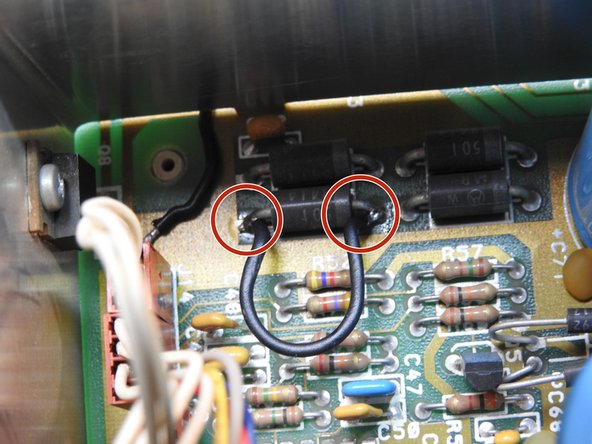
  • With the SIO connectors facing away from you and the front of the unit facing you, locate the four diodes.

  • Preferably, use 20 AWG wire for the connections.

  • Solder the first bridge on top of the CR19, which is one of the 4 large diodes (the one at the bottom left)

Zorg dat de SIO-connectoren van je af wijzen en dat de voorkant van het apparaat naar je toe wijst. Zoek vervolgens de vier diodes.

Gebruik bij voorkeur 0,50 mm² voor de verbindingen.

Soldeer de eerste brug bovenop de CR19, een van de vier grote diodes (degene linksonder)

crwdns2944171:0crwdnd2944171:0crwdnd2944171:0crwdnd2944171:0crwdne2944171:0