crwdns2933423:0crwdne2933423:0

Conversión de Atari 1050 a Corriente Continua DC

crwdns2936315:0crwdne2936315:0
crwdns2936331:0crwdne2936331:0
crwdns2931653:04crwdne2931653:0
The simple Atari 1050 Disk Drive Conversion to DC, Place the first jumper: crwdns2935265:00crwdnd2935265:01crwdnd2935265:03crwdne2935265:0 The simple Atari 1050 Disk Drive Conversion to DC, Place the first jumper: crwdns2935265:00crwdnd2935265:02crwdnd2935265:03crwdne2935265:0 The simple Atari 1050 Disk Drive Conversion to DC, Place the first jumper: crwdns2935265:00crwdnd2935265:03crwdnd2935265:03crwdne2935265:0
Place the first jumper
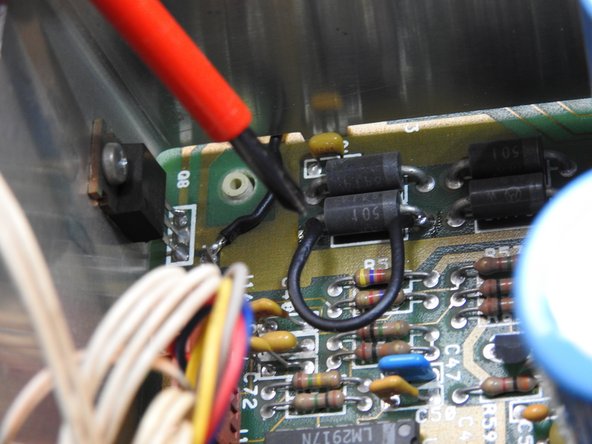
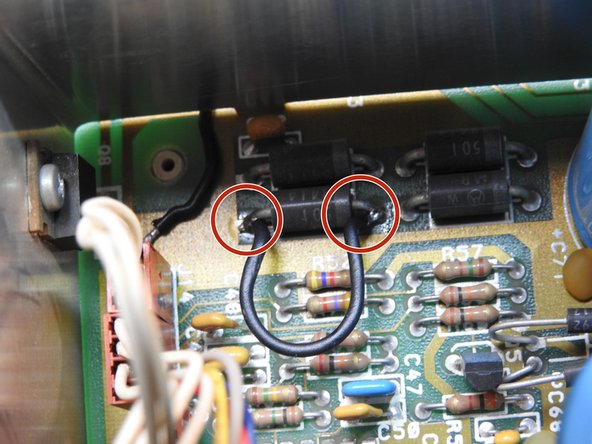
  • With the SIO connectors facing away from you and the front of the unit facing you, locate the four diodes.

  • Preferably, use 20 AWG wire for the connections.

  • Solder the first bridge on top of the CR19, which is one of the 4 large diodes (the one at the bottom left)

Encuentra los 4 diodos rectificadores, con forma de cilindro negros.

Usa preferentemente cable de espesor 20AWG para las conexiones.

Soldar el primer cable por sobre el diodo CR19, que es el de abajo a la izquierda.

crwdns2944171:0crwdnd2944171:0crwdnd2944171:0crwdnd2944171:0crwdne2944171:0