crwdns2935425:035crwdne2935425:0
crwdns2931653:035crwdne2931653:0


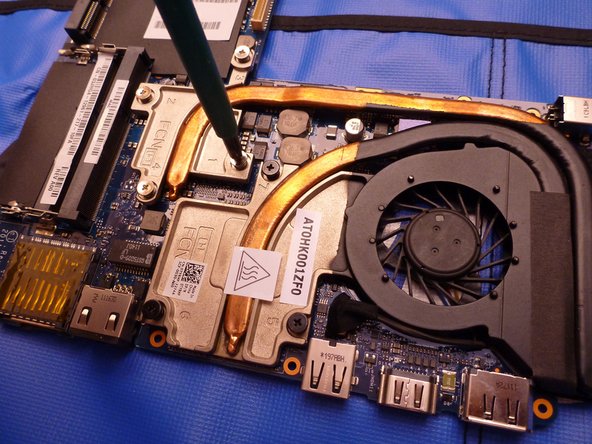


Remove heat sink and apply thermal paste
-
To remove the heatsink and replace thermal paste, remove the screws in the correct order (marked with a number on the heatsink).
-
Rescrew in the correct order (refer to the numbers on the heat sink).
crwdns2944171:0crwdnd2944171:0crwdnd2944171:0crwdnd2944171:0crwdne2944171:0