crwdns2933423:0crwdne2933423:0

Retrait carte mère et haut-parleur interne (Pro)

crwdns2931529:0crwdnd2931529:0crwdnd2931529:0crwdnd2931529:02crwdnd2931529:0crwdne2931529:0

crwdns2936315:0crwdne2936315:0
crwdns2936317:0crwdne2936317:0
crwdns2931653:06crwdne2931653:0
Motherboard and Earpiece Speaker Removal (Pro), Remove the motherboard: crwdns2935265:00crwdnd2935265:01crwdnd2935265:03crwdne2935265:0 Motherboard and Earpiece Speaker Removal (Pro), Remove the motherboard: crwdns2935265:00crwdnd2935265:02crwdnd2935265:03crwdne2935265:0 Motherboard and Earpiece Speaker Removal (Pro), Remove the motherboard: crwdns2935265:00crwdnd2935265:03crwdnd2935265:03crwdne2935265:0
Remove the motherboard
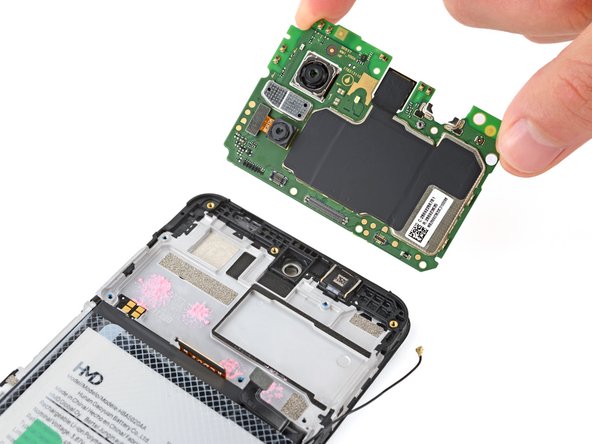
  • Lift and remove the motherboard.

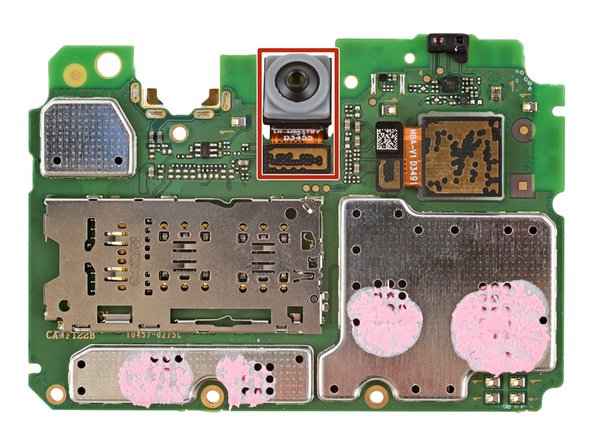
  • The front camera may have disconnected from the bottom of the board during removal. If it did, reconnect its press connector.

  • During reassembly:

  • Make sure the two press connectors on the bottom edge and the antenna cable on the right edge are out of the way so they don't get trapped underneath the board.

  • Lower the board into its recess and press down on the edges to clip it into place.

Soulevez et retirez la carte mère.

La caméra frontale peut avoir été déconnectée de la partie inférieure de la carte au cours du retrait. Si c'est le cas, rebranchez son connecteur à emboîter.

Lors du remontage :

Assurez-vous que les deux connecteurs à emboîter sur le bord inférieur et le câble d'antenne sur le bord droit sont écartés afin qu'ils ne restent pas coincés sous la carte.

Insérez la carte dans son logement et appuyez sur les bords pour la clipser.

crwdns2944171:0crwdnd2944171:0crwdnd2944171:0crwdnd2944171:0crwdne2944171:0