crwdns2933423:0crwdne2933423:0

2018 MacBook Pro 13" Touch Bar tauschen

crwdns2936315:0crwdne2936315:0
crwdns2936319:0crwdne2936319:0
crwdns2931653:03crwdne2931653:0
2018 MacBook Pro 13" Touch Bar Replacement, Touch ID sensor: crwdns2935265:00crwdnd2935265:01crwdnd2935265:03crwdne2935265:0 2018 MacBook Pro 13" Touch Bar Replacement, Touch ID sensor: crwdns2935265:00crwdnd2935265:02crwdnd2935265:03crwdne2935265:0 2018 MacBook Pro 13" Touch Bar Replacement, Touch ID sensor: crwdns2935265:00crwdnd2935265:03crwdnd2935265:03crwdne2935265:0
Touch ID sensor
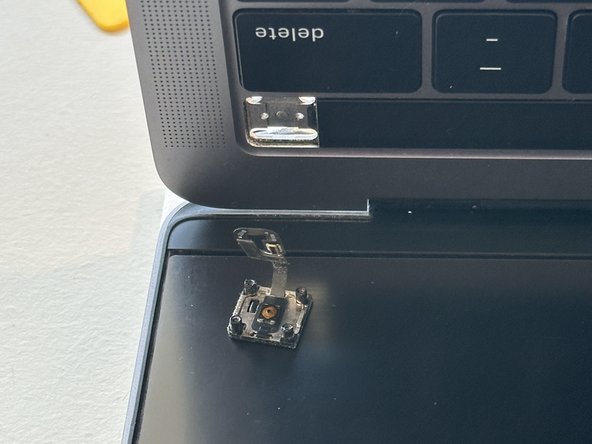
  • This is not strictly required. However I found when removing the Touch Bar that it necessitated a lot of scraping and force near the Touch ID sensor, thus I advise removing it for protection.

  • It is quite easy to remove, just be careful with the flex cable as it seems very fragile.

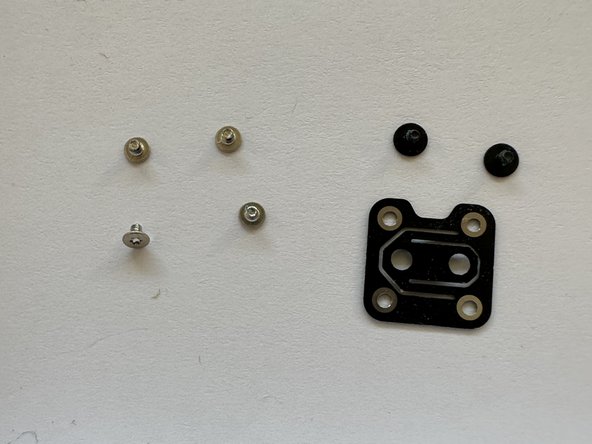
  • Remove the 4 red screws

  • Remove the 2 green screws

  • Remove the black bracket which is now free

  • Carefully open the laptop lid with the screen at the bottom. The Touch ID sensor should free itself and stay on the screen.

Dieser Schritt ist nicht zwingend notwendig. Allerdings entsteht beim Abkratzen der Touch Bar eine Menge von Splittern Nähe beim Sensor und er kann so besser geschützt werden.

Es ist ziemlich leicht ihn auszubauen, achte nur auf das empfindliche Flachbandkabel.

Entferne die vier rot markierten Schrauben.

Entferne die beiden grün markierten Schrauben.

Die schwarze Halterung ist dann frei, entferne sie.

Öffne den Laptop vorsichtig mit dem Display nach unten. Der Touch ID Sensor sollte herauskommen und auf dem Display liegen bleiben.

crwdns2944171:0crwdnd2944171:0crwdnd2944171:0crwdnd2944171:0crwdne2944171:0