crwdns2933423:0crwdne2933423:0

Hauptplatine ausbauen

crwdns2931527:0crwdnd2931527:0crwdnd2931527:0crwdnd2931527:0crwdne2931527:0

crwdns2936315:0crwdne2936315:0
crwdns2936319:0crwdne2936319:0
crwdns2931653:04crwdne2931653:0
Main Board Removal: crwdns2935265:00crwdnd2935265:01crwdnd2935265:03crwdne2935265:0 Main Board Removal: crwdns2935265:00crwdnd2935265:02crwdnd2935265:03crwdne2935265:0 Main Board Removal: crwdns2935265:00crwdnd2935265:03crwdnd2935265:03crwdne2935265:0
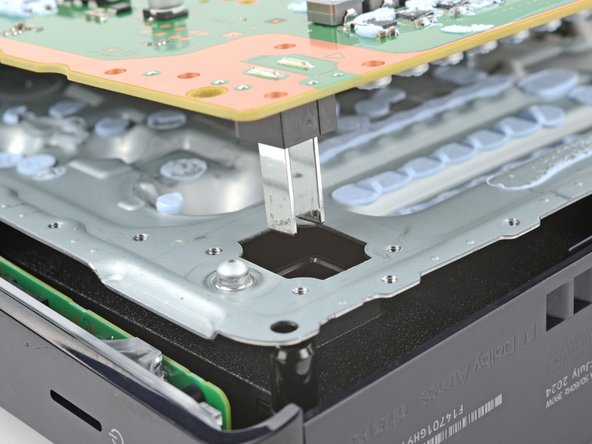
  • The power supply is connected to the bottom of the main board assembly by metal prongs that plug into the bottom left corner.

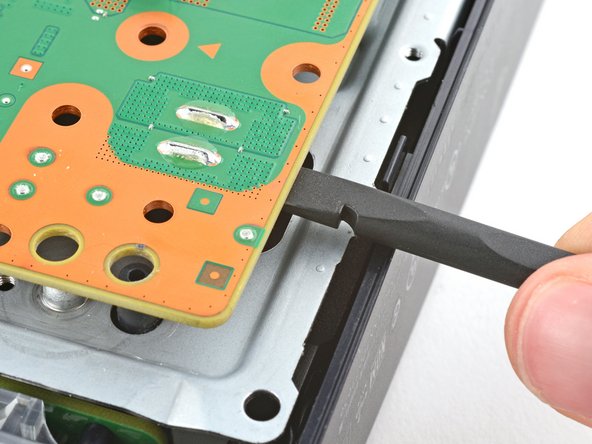
  • Insert the flat end of a spudger between the board and the lower shield plate, by the two parallel solder joints near the corner with the power button.

  • Use your spudger to pry up the board until the two prongs come completely out of their socket.

  • You should feel the prongs slide out.

  • During reassembly, press down on the corner of the board to fully seat the prongs in the power supply—you should feel them slide into place.

Die Stromversorgung der Hauptplatine wird über Metallzungen hergestellt, die sich in der linken Ecke auf der Unterseite der Platine befinden.

Setze das flache Ende des Spudgers bei den beiden parallelen Lötstellen in der Ecke mit der Einschalttaste zwischen die Platine und die untere Abschirmung ein

Heble die Platine mit dem Spudger soweit hoch, bis die Metallzungen komplett aus dem Anschluss herauskommen.

Du solltest es spüren, wenn die Metallzungen herausgleiten.

Drücke die Ecke der Platine beim Zusammenbau nach unten, damit die Metallzungen guten Kontakt mit der Stromversorgung erhalten. Du solltest es spüren, wenn sie hineinrutschen.

crwdns2944171:0crwdnd2944171:0crwdnd2944171:0crwdnd2944171:0crwdne2944171:0