crwdns2933423:0crwdne2933423:0

Hauptplatine ausbauen

crwdns2931527:0crwdnd2931527:0crwdnd2931527:0crwdnd2931527:0crwdne2931527:0

crwdns2935425:01crwdne2935425:0

crwdns2936315:0crwdne2936315:0
crwdns2936319:0crwdne2936319:0
crwdns2931653:01crwdne2931653:0
Main Board Removal, Remove the main board screws: crwdns2935265:00crwdnd2935265:01crwdnd2935265:02crwdne2935265:0 Main Board Removal, Remove the main board screws: crwdns2935265:00crwdnd2935265:02crwdnd2935265:02crwdne2935265:0
Remove the main board screws
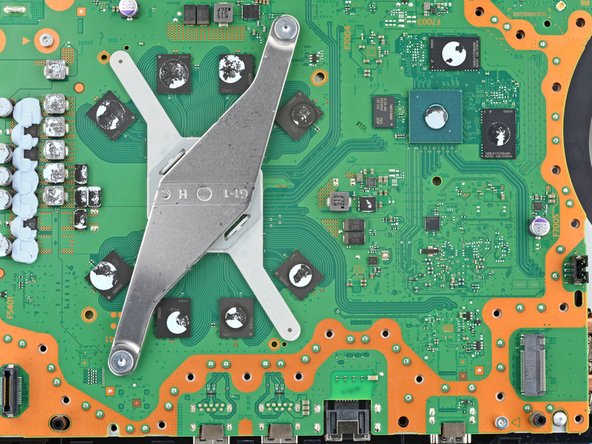
  • Use a T8 Torx Security screwdriver to remove the four remaining screws securing the main board:

  • Two 7.5 mm‑long main board screws

  • Two 16.3 mm‑long screws securing the APU tension bracket

  • Don't remove or install one screw at a time, or you may damage the APU. During disassembly and reassembly, alternate between the two screws a 1/2 turn at a time to maintain even pressure on the bracket.

Entferne die vier restlichen Torx T8 Sicherheitsschrauben, mit denen die Hauptplatine befestigt ist.

Zwei 7,5 mm lange Schrauben an der Hauptplatine

Zwei 16,3 mm lange Schrauben, mit denen die APU unter Spannung gehalten wird

Drehe die Schrauben nicht einzeln heraus oder hinein, die APU könnte beschädigt werden. Drehe die Schrauben abwechselnd jeweils eine halbe Umdrehung weiter, damit die Spannung der Halterung gleichmäßig bleibt.

crwdns2944171:0crwdnd2944171:0crwdnd2944171:0crwdnd2944171:0crwdne2944171:0