crwdns2933423:0crwdne2933423:0

AT-LP120-USB Start/Stop Button Replacement

crwdns2936315:0crwdne2936315:0
crwdns2936321:0crwdne2936321:0
crwdns2931653:011crwdne2931653:0
AT-LP120-USB Start/Stop Button Replacement, Reassembly: Placing Bottom Cover: crwdns2935265:00crwdnd2935265:01crwdnd2935265:03crwdne2935265:0 AT-LP120-USB Start/Stop Button Replacement, Reassembly: Placing Bottom Cover: crwdns2935265:00crwdnd2935265:02crwdnd2935265:03crwdne2935265:0 AT-LP120-USB Start/Stop Button Replacement, Reassembly: Placing Bottom Cover: crwdns2935265:00crwdnd2935265:03crwdnd2935265:03crwdne2935265:0
Reassembly: Placing Bottom Cover
  • Spin the turntable back around such that the rear is facing you.

  • Place the hinges back into the dust cover.

  • Press this part of the hinge so the hinge is in a vertical position.

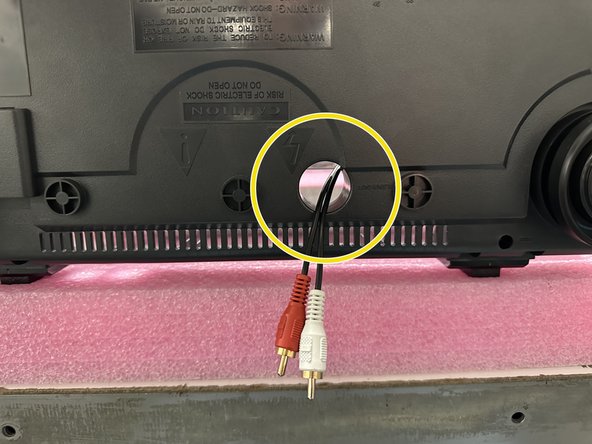
  • Locate the bottom cover, and route the RCA cables com from the turntable through this hole.

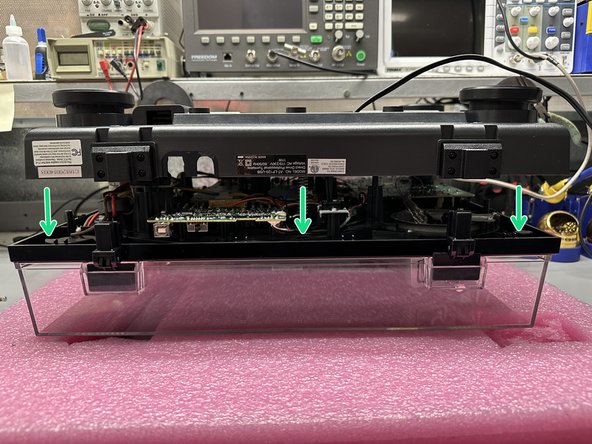
  • Place the bottom cover onto the turntable such that the dust cover hinges are inserted into their respective brackets, and all ports are visible.

  • Depending on manufacturer date, you may need to tilt the bottom cover and insert the ports/switches before re-attaching the hinges and dust cover.

crwdns2935429:0crwdne2935429:0

crwdns2935429:0crwdne2935429:0

crwdns2935429:0crwdne2935429:0

crwdns2935429:0crwdne2935429:0

crwdns2935429:0crwdne2935429:0

crwdns2935429:0crwdne2935429:0

crwdns2944171:0crwdnd2944171:0crwdnd2944171:0crwdnd2944171:0crwdne2944171:0