crwdns2933423:0crwdne2933423:0

Dismantling the Melitta Caffeo CI brew group in the appliance

crwdns2936319:0crwdne2936319:0
crwdns2936315:0crwdne2936315:0
crwdns2931653:06crwdne2931653:0
Melitta Caffeo CI Brühgruppe im Gerät zerlegen, (Optional) Motorverbindung lösen - Teil 1: crwdns2935265:00crwdnd2935265:01crwdnd2935265:03crwdne2935265:0 Melitta Caffeo CI Brühgruppe im Gerät zerlegen, (Optional) Motorverbindung lösen - Teil 1: crwdns2935265:00crwdnd2935265:02crwdnd2935265:03crwdne2935265:0 Melitta Caffeo CI Brühgruppe im Gerät zerlegen, (Optional) Motorverbindung lösen - Teil 1: crwdns2935265:00crwdnd2935265:03crwdnd2935265:03crwdne2935265:0
(Optional) Motorverbindung lösen - Teil 1
  • Diesen Schritt nur ausführen wenn es wirklich nötig ist. Sprich wenn im Schritt zuvor die Brühkammer nicht in Position gebracht werden konnte. Wie anfangs erwähnt ist es je nach Situation nötig das Gehäuse zu entfernen. Jetzt wäre es soweit bitte der oben verlinkten Anleitung folgen.

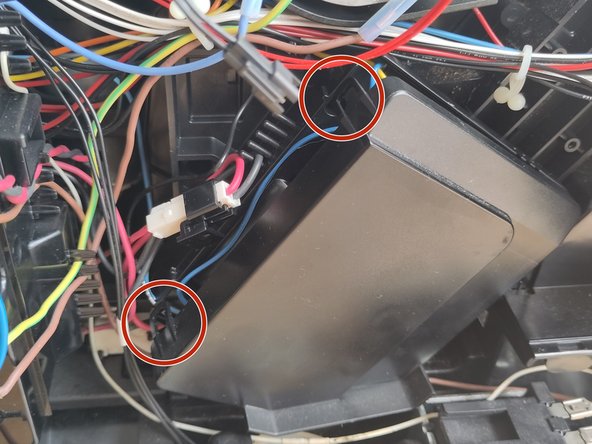
  • Die schwarze Abdeckung hat 4 Clips. Die Clips an der roten Markierung aufhebeln, dann sollten sich die Clips an der orangen Markierung leicht öffnen lassen wenn man die Abdeckung etwas abwinkelt (Bild 2).

  • Vorsichtshalber ein Foto von der Stellung des Rades machen, könnte wichtig werden beim Zusammenbau.

  • Das Rad (Bild 3, orange Markierung) abziehen, könnte stramm sitzen. Die beiden weißen Schalter (Bild 3, gelbe Markierung) sind je über 2 Clips befestigt diese lösen.

  • Die 3 Tx10 Schrauben (Bild 3, rote Markierung) entfernen und Plastikdeckel abnehmen. Es könnten Teile entgegen fallen, etwas Vorsicht walten lassen.

Only carry out this step if it is really necessary. In other words, if the brewing chamber could not be brought into position in the previous step. As mentioned at the beginning, it may be necessary to remove the housing depending on the situation. Now you are ready, please follow the instructions linked to previously.

The black cover has 4 clips. Pry open the clips at the red mark, then the clips at the orange mark should be easy to open if you bend the cover slightly (Fig. 2).

To be on the safe side, take a photo of the position of the wheel, this could be important when reassembling.

Pull off the wheel (Fig. 3, orange marking), it could be tight. The two white switches (Fig. 3, yellow marking) are each attached with 2 clips; loosen these.

Remove the 3 Tx10 screws (Fig. 3, red marking) and remove the plastic cover. Careful here since parts could fall out.

crwdns2944171:0crwdnd2944171:0crwdnd2944171:0crwdnd2944171:0crwdne2944171:0