crwdns2933423:0crwdne2933423:0

Reemplazo de la carcasa frontal OLED de Steam Deck

crwdns2936315:0crwdne2936315:0
crwdns2936331:0crwdne2936331:0
crwdns2931653:029crwdne2931653:0
Steam Deck OLED Front Shell Replacement, Separate the right edge of the midframe: crwdns2935265:00crwdnd2935265:01crwdnd2935265:02crwdne2935265:0 Steam Deck OLED Front Shell Replacement, Separate the right edge of the midframe: crwdns2935265:00crwdnd2935265:02crwdnd2935265:02crwdne2935265:0
Separate the right edge of the midframe
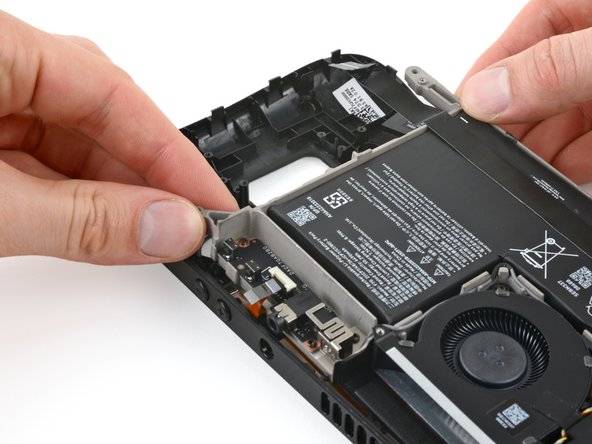
  • Continue holding up the bottom right arm of the midframe with one hand.

  • With your other hand, pry the top edge of the front shell (near the volume buttons) away from the midframe.

  • Lift the top right corner of the midframe away from the front shell until the headphone jack comes free of its cutout.

  • If you feel resistance, either the front shell is caught on the midframe or the screen-side sensor cable is stuck to the midframe. Work slowly and inspect these areas as you pry.

  • During reassembly, squeeze the top edge of the front shell onto the midframe until it snaps into place.

Continúe sosteniendo el brazo inferior derecho del marco central con una mano.

Con la otra mano, levante el borde superior de la carcasa frontal (cerca de los botones de volumen) para separarlo del marco central.

Levante la esquina superior derecha del marco central para separarlo de la carcasa frontal hasta que el conector para auriculares salga de su recorte.

Si siente resistencia, es posible que la carcasa frontal esté enganchada en el marco central o que el cable del sensor del lado de la pantalla esté atascado en él. Trabaje despacio e inspeccione estas áreas mientras hace palanca.

Durante el reensamblaje, presione el borde superior de la carcasa frontal sobre el marco central hasta que encaje en su lugar.

crwdns2944171:0crwdnd2944171:0crwdnd2944171:0crwdnd2944171:0crwdne2944171:0