crwdns2933423:0crwdne2933423:0

Sostituzione guscio anteriore Steam Deck OLED

crwdns2936315:0crwdne2936315:0
crwdns2936321:0crwdne2936321:0
crwdns2931653:014crwdne2931653:0
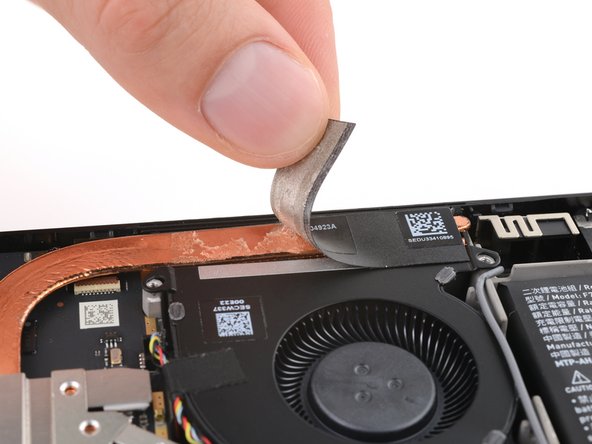
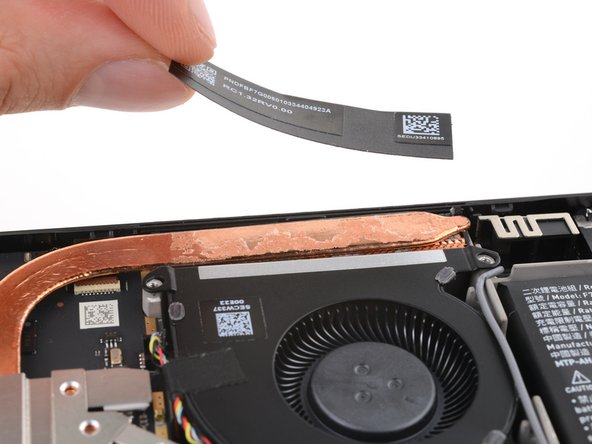
Steam Deck OLED Front Shell Replacement, Remove the heat sink sticker: crwdns2935265:00crwdnd2935265:01crwdnd2935265:03crwdne2935265:0 Steam Deck OLED Front Shell Replacement, Remove the heat sink sticker: crwdns2935265:00crwdnd2935265:02crwdnd2935265:03crwdne2935265:0 Steam Deck OLED Front Shell Replacement, Remove the heat sink sticker: crwdns2935265:00crwdnd2935265:03crwdnd2935265:03crwdne2935265:0
Remove the heat sink sticker
  • Try not to tear the heat sink sticker, as you'll reuse it during reassembly.

  • Slide the tip of an opening pick under one edge of the heat sink sticker.

  • Peel the sticker up until you can grab it with your fingers.

  • Gently remove the sticker from the heat sink and fan.

  • During reassembly, place the sticker back in its original location. The residual adhesive should stick well.

  • If the residual adhesive isn't sticky anymore, tape the outside edges of the sticker to the heat sink and fan with small strips of tape.

Cerca di non strappare l'adesivo, dato che dovrai riutilizzarlo durante il riassemblaggio.

Fai scivolare la punta di un plettro di apertura sotto un'estremità dell'adesivo.

Solleva l'adesivo finché non riesci a prenderlo con le dita.

Rimuovi delicatamente l'adesivo dal dissipatore di calore e dalla ventola.

Durante il riassemblaggio, riposiziona l'adesivo nel suo punto originale. La colla residua dovrebbe fare una presa sufficiente.

Se la colla residua non attacca più, utilizza delle piccole striscie di scotch sui bordi dell'adesivo.

crwdns2944171:0crwdnd2944171:0crwdnd2944171:0crwdnd2944171:0crwdne2944171:0