crwdns2931529:0crwdnd2931529:0crwdnd2931529:0crwdnd2931529:06crwdnd2931529:0crwdne2931529:0
crwdns2935425:024crwdne2935425:0
crwdns2931653:024crwdne2931653:0


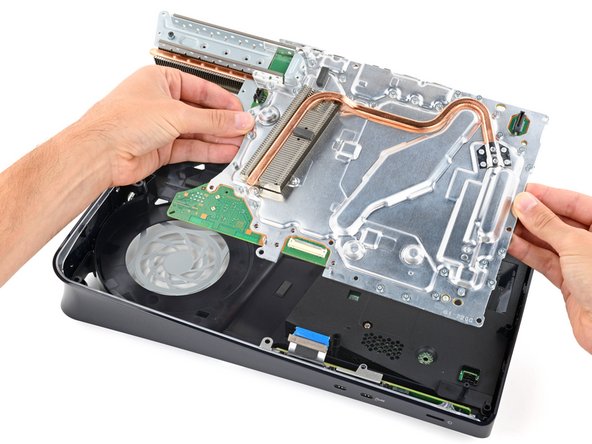


Remove the main board assembly
-
Firmly secure the plastic housing with one hand.
-
With your free hand, grab the upper edge of the main board assembly and lift it out of the plastic housing.
-
Lower the assembly into its recess so its prongs go into their socket on the power supply and the three cutouts go over their alignment posts.
crwdns2944171:0crwdnd2944171:0crwdnd2944171:0crwdnd2944171:0crwdne2944171:0