crwdns2933423:0crwdne2933423:0

主基板アセンブリの取り外し

crwdns2931529:0crwdnd2931529:0crwdnd2931529:0crwdnd2931529:06crwdnd2931529:0crwdne2931529:0

crwdns2936315:0crwdne2936315:0
crwdns2936323:0crwdne2936323:0
crwdns2931653:023crwdne2931653:0
Main Board Assembly Removal, Detach the power supply: crwdns2935265:00crwdnd2935265:01crwdnd2935265:03crwdne2935265:0 Main Board Assembly Removal, Detach the power supply: crwdns2935265:00crwdnd2935265:02crwdnd2935265:03crwdne2935265:0 Main Board Assembly Removal, Detach the power supply: crwdns2935265:00crwdnd2935265:03crwdnd2935265:03crwdne2935265:0
Detach the power supply
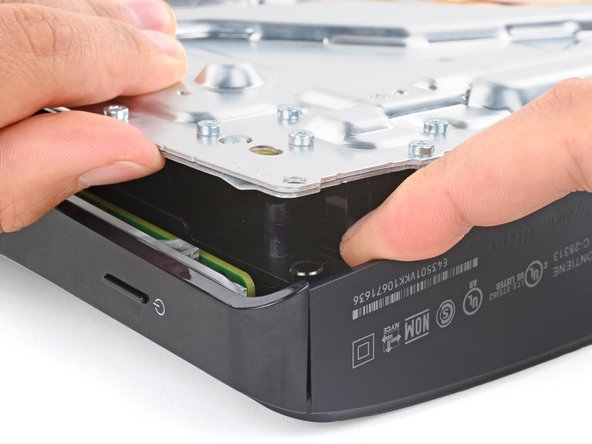
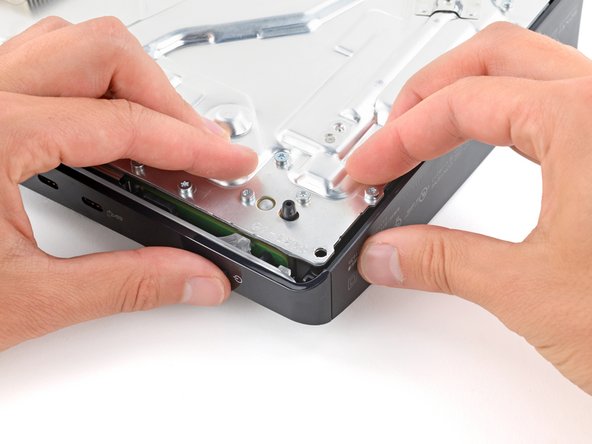
  • Keep the main board assembly raised with one hand.

  • With your free hand, insert your finger between the assembly and power supply.

  • Push down on the power supply and lift the assembly to separate them.

  • It'll take a significant amount of force to separate the two.

  • During reassembly, press down firmly on the bottom left corner of the main board assembly to fully connect it to the power supply.

主基板アセンブリを片手で持ち上げたままにします。

片側の手で、アセンブリと電源装置の間に指を挿入します。

電源を押し下げ、アセンブリを持ち上げて分離します。

2つを分離するにはかなりの力が必要です。

再組み立ての際は、主基板アセンブリの左下隅をしっかりと押し込み、電源装置に接続します。

crwdns2944171:0crwdnd2944171:0crwdnd2944171:0crwdnd2944171:0crwdne2944171:0