crwdns2933423:0crwdne2933423:0

ディスプレイアセンブリの取り外し

crwdns2931529:0crwdnd2931529:0crwdnd2931529:0crwdnd2931529:02crwdnd2931529:0crwdne2931529:0

crwdns2936315:0crwdne2936315:0
crwdns2936323:0crwdne2936323:0
crwdns2931653:023crwdne2931653:0
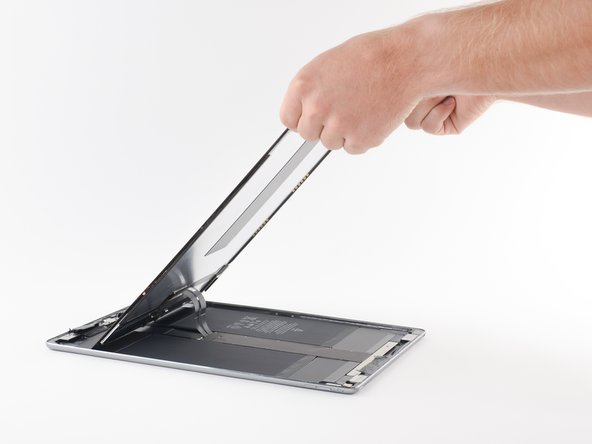
Display Assembly (Unfasten), Lift the display: crwdns2935265:00crwdnd2935265:01crwdnd2935265:03crwdne2935265:0 Display Assembly (Unfasten), Lift the display: crwdns2935265:00crwdnd2935265:02crwdnd2935265:03crwdne2935265:0 Display Assembly (Unfasten), Lift the display: crwdns2935265:00crwdnd2935265:03crwdnd2935265:03crwdne2935265:0
Lift the display
  • The iPad shown in the following two steps is the iPad Pro 12.9" 1st Generation. The internals look slightly different but the taping procedure is the same.

  • The display cables in this iPad are very short. Read the next two steps before you proceed.

  • Do not pivot the screen about the lower edge. The display cables don't have enough slack to allow for this and will tear if you do not slide the screen towards the front-facing camera as you lift.

  • The display cables will tear if you raise the screen more than 90º.

  • Lift up the upper edge of the screen and slide the entire screen towards the front-facing camera to access the iPad's internal components.

  • Use masking tape to tape the lower edge of the screen to the frame to prevent the screen from slipping.

ここからの2手順で使われている画像にはiPad Pro 12.9インチモデル(第一世代)が使われています。内部の見た目は若干異なるかもしれませんが、作業手順自体は変わりません。

このiPadに使われているディスプレイケーブルは非常に短いです。実際に作業を置くなう前に、これからの2手順の内容を読んで理解して下さい。

スクリーンの下端を持ち上げてめくり上げないで下さい。ディスプレイケーブルにはこれができるだけの長さはありませんし、持ち上げた状態でスクリーンをフロントカメラに近づける方向以外に動かすとディスプレイケーブルが千切れてしまいます。

スクリーンを90度以上持ち上げると、ディスプレイケーブルが千切れます。

スクリーンの上辺を持ち上げてスクリーン全体をフロントカメラの方にずらすと、iPadの内部部品を扱うことができます。

マスキングテープを使ってスクリーンの下辺を筐体に固定することで、スクリーンが滑って動いてしまうのを防ぐことができます。

crwdns2944171:0crwdnd2944171:0crwdnd2944171:0crwdnd2944171:0crwdne2944171:0