crwdns2933423:0crwdne2933423:0

Test e sostituzione sensore di umidità asciugatrice Whirlpool

crwdns2936315:0crwdne2936315:0
crwdns2936321:0crwdne2936321:0
crwdns2931653:03crwdne2931653:0
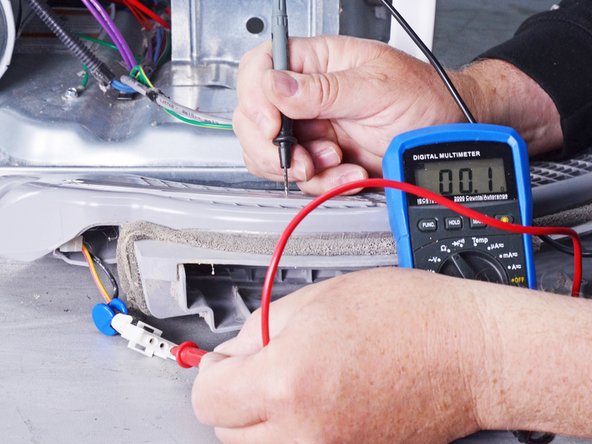
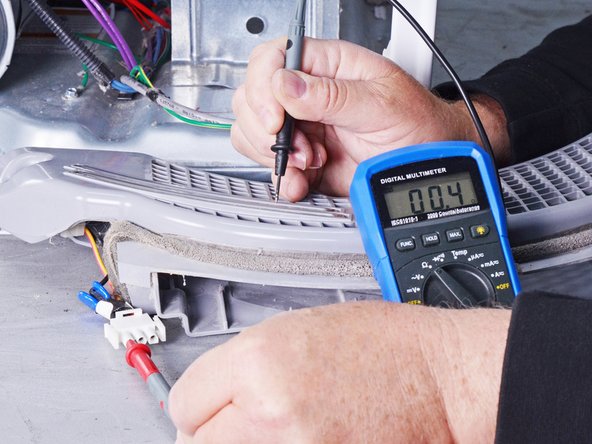
Whirlpool Dryer Moisture Sensor Testing and Replacement, Check continuity from strip to connector: crwdns2935265:00crwdnd2935265:01crwdnd2935265:03crwdne2935265:0 Whirlpool Dryer Moisture Sensor Testing and Replacement, Check continuity from strip to connector: crwdns2935265:00crwdnd2935265:02crwdnd2935265:03crwdne2935265:0 Whirlpool Dryer Moisture Sensor Testing and Replacement, Check continuity from strip to connector: crwdns2935265:00crwdnd2935265:03crwdnd2935265:03crwdne2935265:0
Check continuity from strip to connector
  • The next two steps will require a multimeter. If you aren't familiar with how to use one, here is a guide that will help you.

  • Set the multimeter to resistance (Ω) and check the continuity between the two metal strips and their respective ports located on the outside edges of the connector.

  • Trace the connector wires on the back of the module to match each port to a metal strip.

  • If the strips show continuity (less than 1 Ω) to the connector, go to the next step.

  • If either strip shows an open circuit (OL) to its connector, skip the next step.

I due passi successivi richiedono un multimetro. Se non sai come usare un multimetro, qui c'è una guida che ti aiuterà.

Imposta il multimetro sulla resistenza (Ω) e controlla la continuità tra le due strisce di metallo e le rispettive porte situate sui bordi esterni del connettore.

Traccia i cavi del connettore sul retro del modulo per far corrispondere ogni porta a una striscia di metallo.

Se le strisce mostrano continuità (meno di 1 Ω) rispetto al connettore, vai al passo successivo.

Se una delle due strisce mostra un circuito aperto (OL) al suo connettore, salta il passo successivo.

crwdns2944171:0crwdnd2944171:0crwdnd2944171:0crwdnd2944171:0crwdne2944171:0