crwdns2933423:0crwdne2933423:0

Whirlpool Trockner Motor testen und tauschen

crwdns2936315:0crwdne2936315:0
crwdns2936319:0crwdne2936319:0
crwdns2931653:03crwdne2931653:0
Whirlpool Dryer Motor Testing and Replacement, Test the start winding: crwdns2935265:00crwdnd2935265:01crwdnd2935265:03crwdne2935265:0 Whirlpool Dryer Motor Testing and Replacement, Test the start winding: crwdns2935265:00crwdnd2935265:02crwdnd2935265:03crwdne2935265:0 Whirlpool Dryer Motor Testing and Replacement, Test the start winding: crwdns2935265:00crwdnd2935265:03crwdnd2935265:03crwdne2935265:0
Test the start winding
  • This step will require a multimeter. If you aren't familiar with how to use one, here is a guide that will help you.

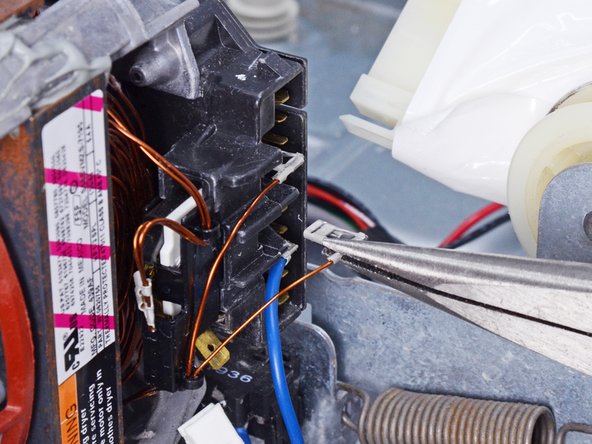
  • Disconnect the wire that is connected to the start winding that you located on the schematic. On this machine, it is aligned with terminal 3.

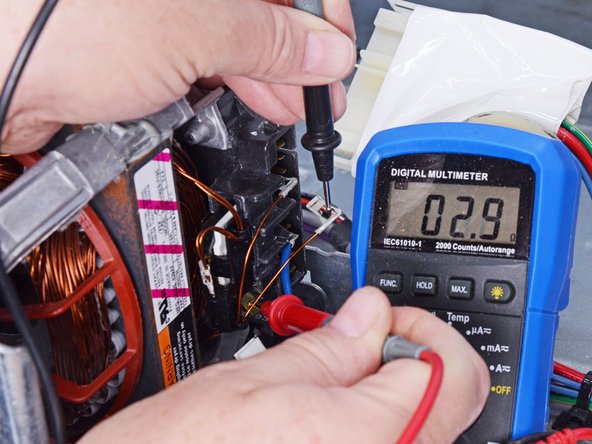
  • Measure the resistance from the start winding wire to the common terminal shared between the start and run windings. Use the lowest resistance setting (usually Rx1) on your multimeter if you need to set it manually.

  • The value should be 2–5 Ω. If it's outside that range or OL, the motor is defective and needs to be replaced.

Für diesen Schritt brauchst du ein Multimeter. Wenn du nicht weißt, wie man es benutzt, findest du hier eine Anleitung, die dir weeiterhilft.

Trenne das Kabel ab, das mit der Startwicklung verbunden ist, die du auf dem Schaltplan gefunden hast. Bei dieser Maschine ist es auf Anschluss 3 ausgerichtet.

Miss den Widerstand zwischen dem Draht der Startwicklung und dem gemeinsamen Anschluss von Start- und Laufwicklung. Verwende die niedrigste Widerstandseinstellung (normalerweise Rx1) an deinem Multimeter, wenn du es manuell einstellen musst.

Der Wert sollte 2-5 Ω betragen. Wenn er außerhalb dieses Bereichs oder OL liegt, ist der Motor defekt und muss ausgetauscht werden.

crwdns2944171:0crwdnd2944171:0crwdnd2944171:0crwdnd2944171:0crwdne2944171:0