crwdns2933423:0crwdne2933423:0

Google Pixel 7aのバッテリー交換

crwdns2936315:0crwdne2936315:0
crwdns2936323:0crwdne2936323:0
crwdns2931653:010crwdne2931653:0
Google Pixel 7a Battery Replacement, Prepare your frame for reassembly: crwdns2935265:00crwdnd2935265:01crwdnd2935265:03crwdne2935265:0 Google Pixel 7a Battery Replacement, Prepare your frame for reassembly: crwdns2935265:00crwdnd2935265:02crwdnd2935265:03crwdne2935265:0 Google Pixel 7a Battery Replacement, Prepare your frame for reassembly: crwdns2935265:00crwdnd2935265:03crwdnd2935265:03crwdne2935265:0
Prepare your frame for reassembly
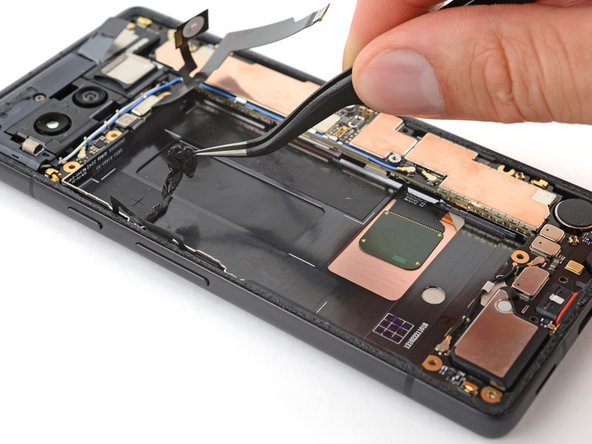
  • The next three steps show how to apply new adhesive and install a new battery.

  • Use the flat end of your spudger to scrape an edge of the old adhesive into a ball large enough to grip with a pair of tweezers.

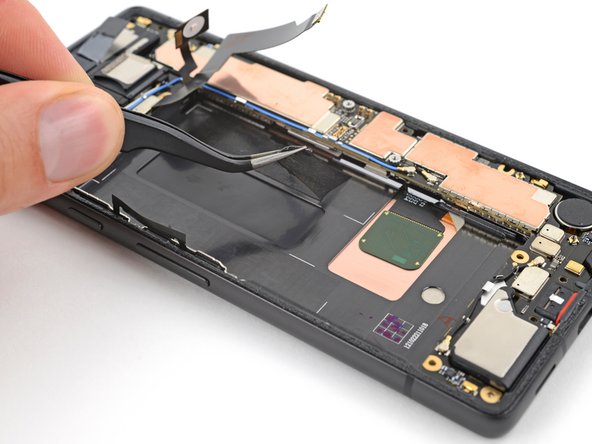
  • Use tweezers or your fingers to peel and remove the old adhesive from the frame.

  • If any residue remains, apply a few drops of highly-concentrated isopropyl alcohol (over 90%) to the frame and wipe it with a lint-free or microfiber cloth.

次の3つの手順では、新しい接着剤を塗布し、新しいバッテリーを取り付ける方法を示します。

スパッジャーの平らな方の先端を使って、古い接着剤の端を除去してまとめ、ピンセットで掴めるくらいの大きさにします。

ピンセットか指を使って、古い接着剤をフレームから剥がして取り除きます。

残留物が残っている場合は、高濃度のイソプロピルアルコール(90%以上)をフレームに数滴垂らし、糸くずの出ない布かマイクロファイバー製の布で拭いてください。

crwdns2944171:0crwdnd2944171:0crwdnd2944171:0crwdnd2944171:0crwdne2944171:0