crwdns2933423:0crwdne2933423:0

Google Pixel 7a スクリーンの交換

crwdns2936315:0crwdne2936315:0
crwdns2936323:0crwdne2936323:0
crwdns2931653:018crwdne2931653:0
Google Pixel 7a Screen Replacement: crwdns2935265:00crwdnd2935265:01crwdnd2935265:03crwdne2935265:0 Google Pixel 7a Screen Replacement: crwdns2935265:00crwdnd2935265:02crwdnd2935265:03crwdne2935265:0 Google Pixel 7a Screen Replacement: crwdns2935265:00crwdnd2935265:03crwdnd2935265:03crwdne2935265:0
  • Take your time aligning the adhesive with the frame—it's very sticky and can't be moved after you apply it.

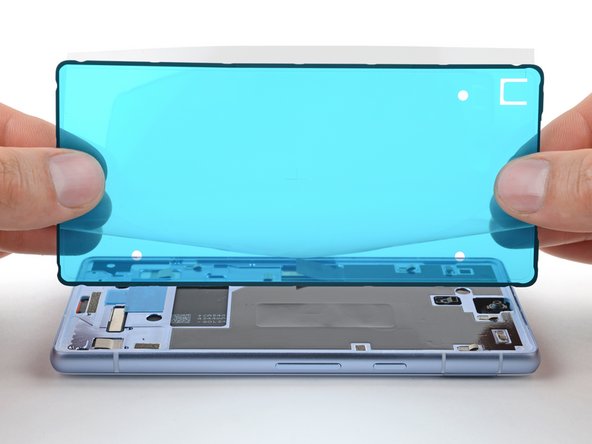
  • Peel up the right half of the large adhesive liner. Don't remove the whole liner, yet.

  • Hold the adhesive by its short edges, with the right long edge of the liner folded back to expose the adhesive.

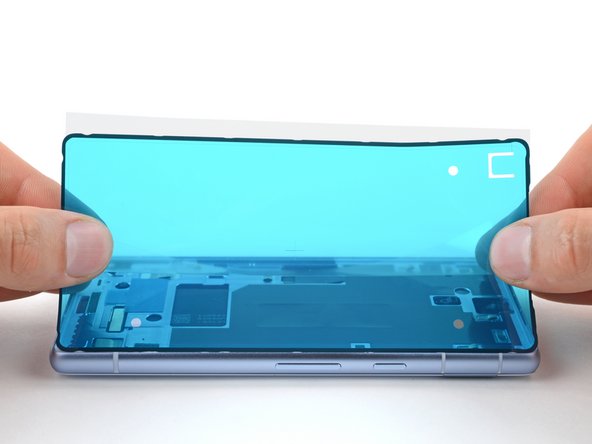
  • Lay the right long edge of the adhesive onto the frame.

慎重に、ゆっくりと時間をかけながら接着剤とフレームの位置合わせを行なってください。テープの粘着力が強く、一度貼った後は動かすことができません。

大きな接着ライナーの右半分を剥がします。まだライナー全体を剥がさないでください。

ライナー右側の長辺を折り返して接着剤を露出させながら、接着剤の短辺側の両側を持ちます。

接着剤の右側の長辺をフレームの上に重ねます。

crwdns2944171:0crwdnd2944171:0crwdnd2944171:0crwdnd2944171:0crwdne2944171:0