crwdns2933423:0crwdne2933423:0

Microsoft Surface Laptop 3 15インチ ディスプレイアセンブリの取り外し

crwdns2931529:0crwdnd2931529:0crwdnd2931529:0crwdnd2931529:04crwdnd2931529:0crwdne2931529:0

crwdns2936315:0crwdne2936315:0
crwdns2936323:0crwdne2936323:0
crwdns2931653:07crwdne2931653:0
Microsoft Surface Laptop 3 15" Display Assembly Removal, Remove four hinge screws: crwdns2935265:00crwdnd2935265:01crwdnd2935265:03crwdne2935265:0 Microsoft Surface Laptop 3 15" Display Assembly Removal, Remove four hinge screws: crwdns2935265:00crwdnd2935265:02crwdnd2935265:03crwdne2935265:0 Microsoft Surface Laptop 3 15" Display Assembly Removal, Remove four hinge screws: crwdns2935265:00crwdnd2935265:03crwdnd2935265:03crwdne2935265:0
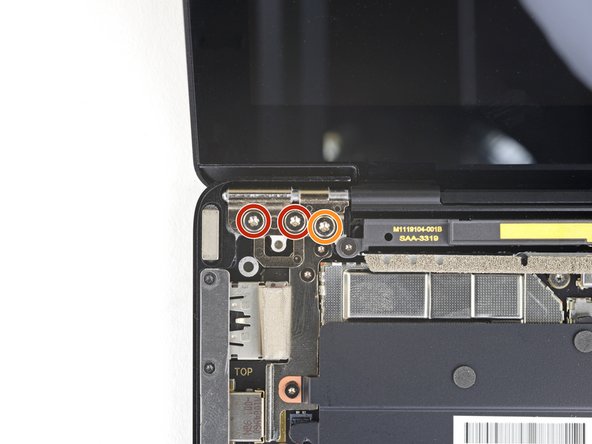
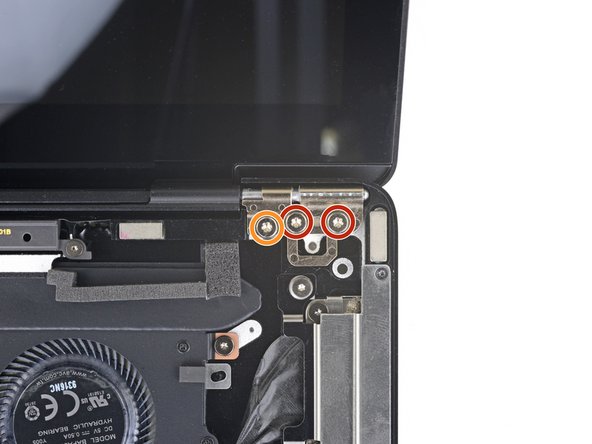
Remove four hinge screws
  • When removing the hinge screws, make sure to hold the screen steady as it will become more and more loose as the hinge screws are gradually removed.

  • While holding the screen steady, use a T6 Torx driver to remove the four outermost 5.9 mm screws securing the screen, two on each side.

  • Leave the two innermost hinge screws in place for now, one on each side.

ヒンジネジを取り外す際は、ネジが徐々に緩むにつれてスクリーンが不安定になるため、しっかりと支えてください。

スクリーンを支えながら、T6トルクスドライバーを使用して、スクリーンを固定している外側の5.9mmネジ4本(左右に2本ずつ)を取り外します。

現時点では、内側のヒンジネジ2本(左右に1本ずつ)はそのままにしておきます。

crwdns2944171:0crwdnd2944171:0crwdnd2944171:0crwdnd2944171:0crwdne2944171:0