crwdns2933423:0crwdne2933423:0

Servicio de limpieza de relojes de carruaje de cuerda

crwdns2936315:0crwdne2936315:0
crwdns2936331:0crwdne2936331:0
crwdns2931653:012crwdne2931653:0
Wind-up carriage clock Service clean, Removing the gear train: crwdns2935265:00crwdnd2935265:01crwdnd2935265:03crwdne2935265:0 Wind-up carriage clock Service clean, Removing the gear train: crwdns2935265:00crwdnd2935265:02crwdnd2935265:03crwdne2935265:0 Wind-up carriage clock Service clean, Removing the gear train: crwdns2935265:00crwdnd2935265:03crwdnd2935265:03crwdne2935265:0
Removing the gear train
  • Some of the wheels will be blocked from being removed by others. Starting with one which is not blocked at all, lift them all off in turn and put them aside in order of removal. Take another photo after removing each one.

  • Finally, remove the drum containing the main spring.

  • Two more wheels remain, secured to the front plate by a screw. These form the reduction gear between the minute and hour hands. Remove the retaining screw and lift the wheels off.

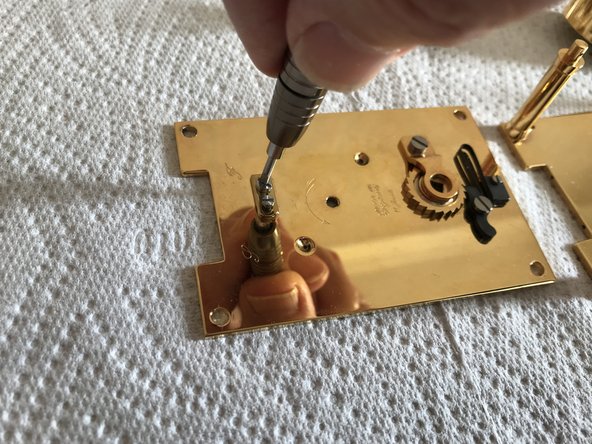
  • On the back of the back plate you will see a small piece of brass with two screws in it. One of these, covering the contrate wheel pivot hole, is an end float adjustment for the contrate wheel. Do not adjust this. The other attaches it to the back plate. Remove this screw and put the brass piece aside.

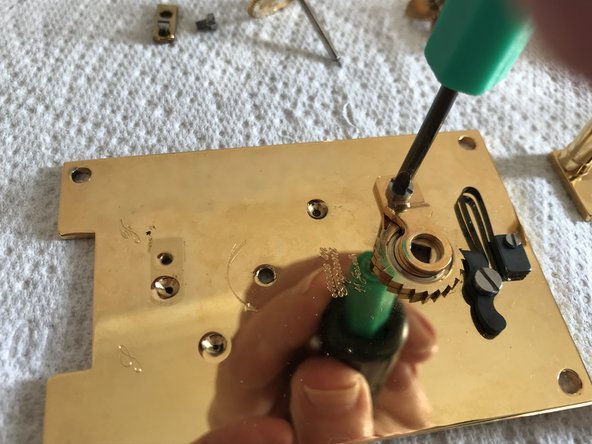
  • Another brass piece secured with a screw covers the ratchet wheel. REmove this too.

  • The clock is now fully disassembled. Take another photo of all the bits so that tomorrow you can brag to all your friends about how you got it all back together again!

Algunas ruedas estarán bloqueadas y no podrán ser retiradas por otras. Empezando por la que no esté bloqueada, sáquelas todas una por una y colóquelas a un lado en orden de retirada. Tome otra foto después de retirar cada una.

Por último, retire el tambor que contiene el resorte principal.

Quedan dos ruedas más, fijadas a la placa frontal con un tornillo. Estas forman el engranaje reductor entre las manecillas de los minutos y las horas. Retire el tornillo de sujeción y levante las ruedas.

En la parte posterior de la placa trasera, verá una pequeña pieza de latón con dos tornillos. Uno de ellos, que cubre el orificio del pivote de la rueda de contacto, ajusta la holgura axial de la rueda de contacto. No lo ajuste. El otro la fija a la placa trasera. Retire este tornillo y deje la pieza de latón a un lado.

Otra pieza de latón, fijada con un tornillo, cubre la rueda de trinquete. Retírela también.

El reloj ya está completamente desarmado. ¡Toma otra foto de todas las piezas para que mañana puedas presumir con tus amigos de cómo lo pusiste todo de nuevo en su sitio!

crwdns2944171:0crwdnd2944171:0crwdnd2944171:0crwdnd2944171:0crwdne2944171:0