crwdns2933423:0crwdne2933423:0

Riassemblaggio Ecovacs Deebot 920

crwdns2936315:0crwdne2936315:0
crwdns2936321:0crwdne2936321:0
crwdns2931653:08crwdne2931653:0
Ecovacs Deebot 920 Reassembly, Installing The Right Wheel Well (cont.): crwdns2935265:00crwdnd2935265:01crwdnd2935265:03crwdne2935265:0 Ecovacs Deebot 920 Reassembly, Installing The Right Wheel Well (cont.): crwdns2935265:00crwdnd2935265:02crwdnd2935265:03crwdne2935265:0 Ecovacs Deebot 920 Reassembly, Installing The Right Wheel Well (cont.): crwdns2935265:00crwdnd2935265:03crwdnd2935265:03crwdne2935265:0
Installing The Right Wheel Well (cont.)
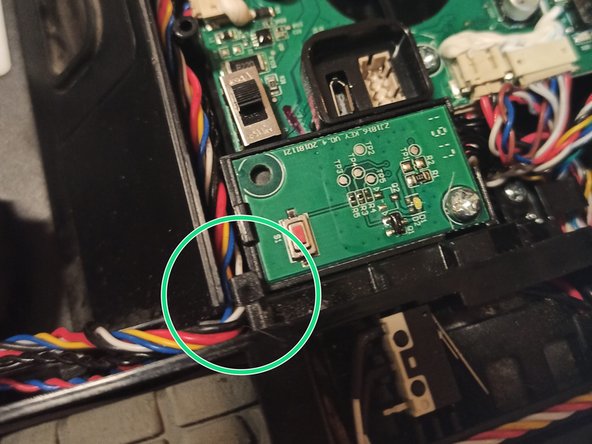
  • While installing the right wheel housing into the unit, ensure that each of the three wire bundles coming out of the top of the motherboard by the power switch are placed underneath this plastic tab. This tap keeps them from being pinched when the top cover is replaced.

  • If the vacuum suction motor or the water pump motors were removed before this step, ensure that their wires are inserted under this tab now, before finishing the wheel well installation.

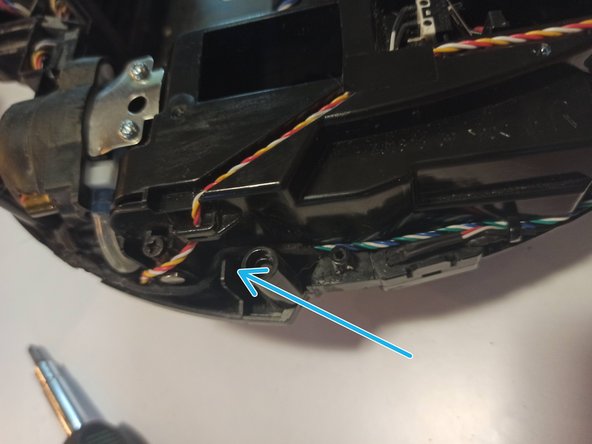
  • Replace the sensor wires which were temporarily placed outside of the screw pegs.

  • Both of the wheel wells should be at the same height above the top of the dust bin area. If they are not equal, it is possible that one of the housings has a pinched wire, or was incorrectly stressed upon insertion, meaning that it did not fully seat down along the sides.

  • Give the sides of the wheel well a quick pinch to see if this correctly seats the wheel well. Snug up all screws again if you find success.

Installando l'alloggiamento della ruota destra nell'apparecchio, assicurati che ognuno dei tre fasci di cavi, che vengono fuori dalla parte superiore della scheda madre attraverso il pulsante di accensione, siano posizionati sotto questa aletta di plastica. Questo evita che siano schiacciati quando la copertura superiore è sostituita.

Se il motore di aspirazione dell'aspirapolvere o i motori della pompa d'acqua sono stati rimossi prima di questo passo, assicurati che i loro cavi siano inseriti sotto questa aletta adesso, prima di finire l'installazione del pozzetto della ruota.

Sostituisci i cavi del sensore che erano stati temporaneamente posti fuori dai perni a vite.

Entrambi i pozzetti delle ruote dovrebbero essere alla stessa altezza sopra la parte superiore dell'area del cestino per la polvere. Se non sono alla stessa altezza, è possibile che uno dei due alloggiamenti abbia un cavo schiacciato o sia stato erroneamente forzato al momento dell'inserimento, quindi non si è completamente inserito lungo i lati.

Dai una stretta veloce ai lati del pozzetto della ruota e vedi se questo inserisce correttamente il pozzetto della ruota. Stringi di nuovo tutte le viti se hai risolto.

crwdns2944171:0crwdnd2944171:0crwdnd2944171:0crwdnd2944171:0crwdne2944171:0