crwdns2933423:0crwdne2933423:0

Riassemblaggio Ecovacs Deebot 920

crwdns2936315:0crwdne2936315:0
crwdns2936321:0crwdne2936321:0
crwdns2931653:07crwdne2931653:0
Ecovacs Deebot 920 Reassembly, Install The Right Wheel Well: crwdns2935265:00crwdnd2935265:01crwdnd2935265:03crwdne2935265:0 Ecovacs Deebot 920 Reassembly, Install The Right Wheel Well: crwdns2935265:00crwdnd2935265:02crwdnd2935265:03crwdne2935265:0 Ecovacs Deebot 920 Reassembly, Install The Right Wheel Well: crwdns2935265:00crwdnd2935265:03crwdnd2935265:03crwdne2935265:0
Install The Right Wheel Well
  • Repeat the process on the other side of the vacuum.

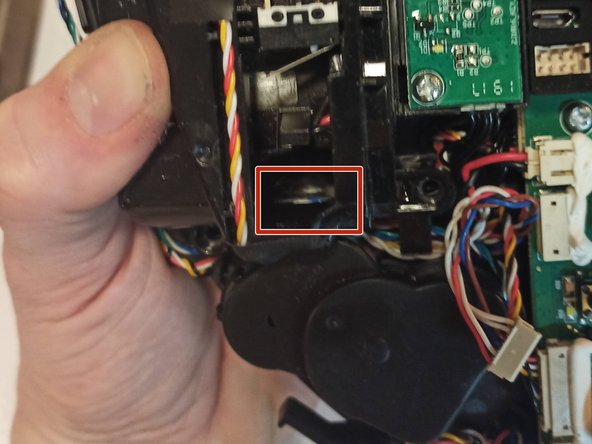
  • Ensure that no wires have become trapped under the front of the housing. The area highlighted in red shows that the white/green/blue wire is pinched.

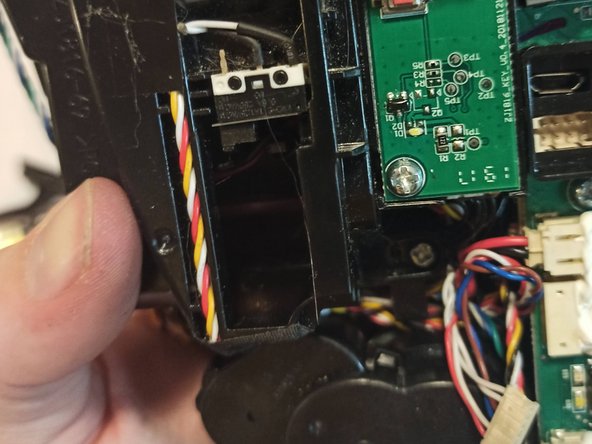
  • The next image shows that the pinch has been resolved, and a beautifully aligned reed switch.

Ripeti il processo sull'altro lato dell'aspirapolvere.

Assicurati che nessun cavo sia rimasto intrappolato sotto alla parte frontale dell'alloggiamento. L'area segnata in rosso mostra che il cavo bianco/verde/blu è schiacciato.

La prossima immagine mostra che lo schiacciamento è stato risolto e mostra un pulsante reed perfettamente allineato.

crwdns2944171:0crwdnd2944171:0crwdnd2944171:0crwdnd2944171:0crwdne2944171:0