crwdns2933423:0crwdne2933423:0

Logitech MX Master 3S 배터리 교체

crwdns2935425:07crwdne2935425:0

crwdns2936315:0crwdne2936315:0
crwdns2936325:0crwdne2936325:0
crwdns2931653:07crwdne2931653:0
Logitech MX Master 3S Battery Replacement, Remove the battery: crwdns2935265:00crwdnd2935265:01crwdnd2935265:03crwdne2935265:0 Logitech MX Master 3S Battery Replacement, Remove the battery: crwdns2935265:00crwdnd2935265:02crwdnd2935265:03crwdne2935265:0 Logitech MX Master 3S Battery Replacement, Remove the battery: crwdns2935265:00crwdnd2935265:03crwdnd2935265:03crwdne2935265:0
Remove the battery
  • Remove the battery.

  • To install a new battery:

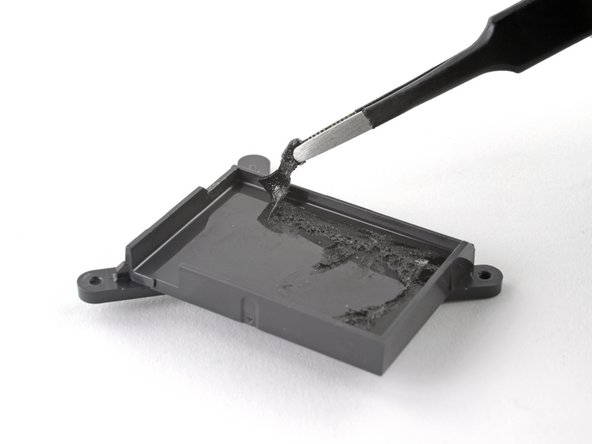
  • Use a spudger or your fingers to peel any old adhesive off of the battery housing. The old adhesive shouldn't leave any residue.

  • If your new battery doesn't come with preinstalled adhesive, place a couple strips of double-sided tape into the battery housing.

  • Orient your new battery so its cables route through the cutout in the corner of the housing. Press the battery firmly into place to secure it.

배터리를 분리하세요.

새로운 배터리를 장착하려면:

스퍼저 (Spudger) 또는 손가락을 이용하여, 배터리 하우징에 남아있는 접착제를 제거하세요. 이전 접착제의 잔여물을 남기면 안됩니다.

교체용 배터리에 접착제가 부착되어 있지 않을 경우, 양면 테이프를 배터리 하우징에 두어장 부착하세요.

배터리 케이블이 배터리 하우징 구석에 위치한 구멍으로 통과할 수 있도록 교체용 배터리를 하우징 내에 배치하세요. 배터리를 단단히 눌러 고정하세요.

crwdns2944171:0crwdnd2944171:0crwdnd2944171:0crwdnd2944171:0crwdne2944171:0