crwdns2933423:0crwdne2933423:0

ロジクール MX Master 3 バッテリーの交換

crwdns2935425:07crwdne2935425:0

crwdns2936315:0crwdne2936315:0
crwdns2936323:0crwdne2936323:0
crwdns2931653:07crwdne2931653:0
Logitech MX Master 3S Battery Replacement, Remove the battery: crwdns2935265:00crwdnd2935265:01crwdnd2935265:03crwdne2935265:0 Logitech MX Master 3S Battery Replacement, Remove the battery: crwdns2935265:00crwdnd2935265:02crwdnd2935265:03crwdne2935265:0 Logitech MX Master 3S Battery Replacement, Remove the battery: crwdns2935265:00crwdnd2935265:03crwdnd2935265:03crwdne2935265:0
Remove the battery
  • Remove the battery.

  • To install a new battery:

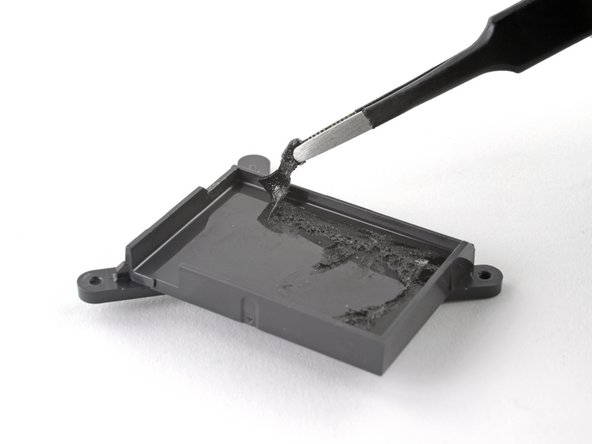
  • Use a spudger or your fingers to peel any old adhesive off of the battery housing. The old adhesive shouldn't leave any residue.

  • If your new battery doesn't come with preinstalled adhesive, place a couple strips of double-sided tape into the battery housing.

  • Orient your new battery so its cables route through the cutout in the corner of the housing. Press the battery firmly into place to secure it.

バッテリーを外します。

新しいバッテリーをインストールするには、

スパッジャーか指を使って、バッテリーハウジングから古い接着剤をはがします。古い接着剤は残らないはずです。

新しいバッテリーにあらかじめ粘着剤が付属していない場合は、バッテリーハウジングに両面テープを2、3枚貼り付けます。

新しいバッテリーのケーブルをハウジングの角の切り欠きに通します。バッテリーをしっかりと押し込んで固定します。

crwdns2944171:0crwdnd2944171:0crwdnd2944171:0crwdnd2944171:0crwdne2944171:0