crwdns2935425:04crwdne2935425:0
crwdns2931653:04crwdne2931653:0

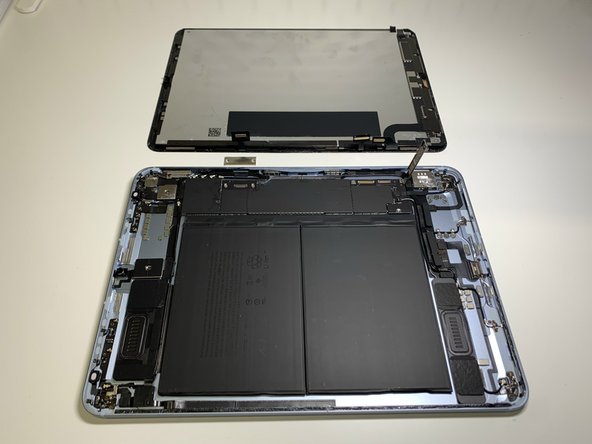


disconnecting a screen connectors
-
using a plastic spatula, disconnect the connectors (three connections).
-
Congratulations, job done. Protect your screen from accidents. Now you can start the main task for which you took down the tablet screen.
crwdns2944171:0crwdnd2944171:0crwdnd2944171:0crwdnd2944171:0crwdne2944171:0