crwdns2933423:0crwdne2933423:0

iPad Air 4 (WiFi & Cellular) Display ausbauen

crwdns2936315:0crwdne2936315:0
crwdns2936319:0crwdne2936319:0
crwdns2931653:03crwdne2931653:0
iPad Air 4 (WiFi & Cellular) display panel disassembly: crwdns2935265:00crwdnd2935265:01crwdnd2935265:03crwdne2935265:0 iPad Air 4 (WiFi & Cellular) display panel disassembly: crwdns2935265:00crwdnd2935265:02crwdnd2935265:03crwdne2935265:0 iPad Air 4 (WiFi & Cellular) display panel disassembly: crwdns2935265:00crwdnd2935265:03crwdnd2935265:03crwdne2935265:0
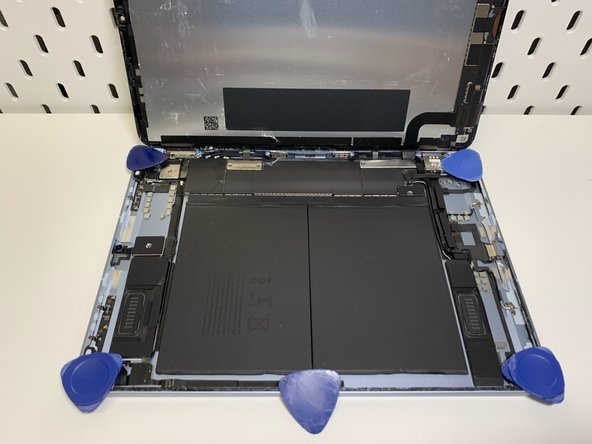
  • repeat for the upper and lower right corners of the tablet. Move slowly.

  • heat the left edge of the tablet once more and slowly (very gently) lift the screen along the left edge - as if opposite to the book.

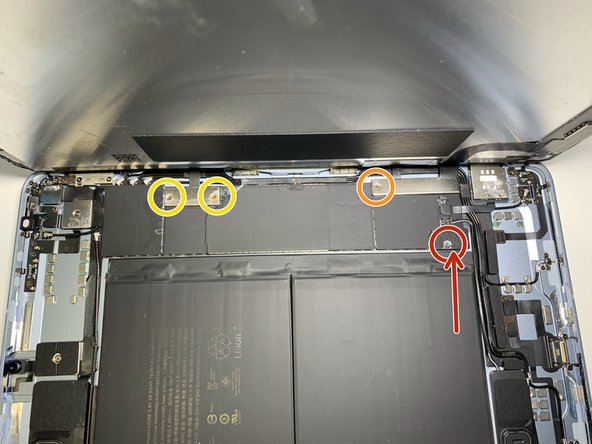
  • unscrew the marked screws. I mark the battery port with red, after removing the screw, insert an insulator between the negative pole of the battery and the motherboard pin (a thin strip of plastic, which I mentioned at the beginning). In my case, the battery is completely discharged so it doesn't have a significant effect

Wiederhole den Vorgang für die obere und untere rechte Ecke des Tablets. Gehe langsam vor.

Erwärme die linke Kante des Tablets noch einmal und hebe das Display langsam und sehr vorsichtig entlang der linken Kante an.

Entferne die markierten Schrauben. Ich habe den Akkuanschluss rot markiert. Nachdem die Schraube entfernt ist, lege ein Isolierstück zwischen den Minuspol des Akkus und den Pin der Hauptplatine (der dünne Plastikstreifen, den ich eingangs erwähnte). Mein Akku war völlig entladen, sodass es keine nennenswerte Auswirkung hat.

crwdns2944171:0crwdnd2944171:0crwdnd2944171:0crwdnd2944171:0crwdne2944171:0