crwdns2933423:0crwdne2933423:0

스크린 분리하기

crwdns2931529:0crwdnd2931529:0crwdnd2931529:0crwdnd2931529:013crwdnd2931529:0crwdne2931529:0

crwdns2936315:0crwdne2936315:0
crwdns2936325:0crwdne2936325:0
crwdns2931653:05crwdne2931653:0
Screen Removal: crwdns2935265:00crwdnd2935265:01crwdnd2935265:03crwdne2935265:0 Screen Removal: crwdns2935265:00crwdnd2935265:02crwdnd2935265:03crwdne2935265:0 Screen Removal: crwdns2935265:00crwdnd2935265:03crwdnd2935265:03crwdne2935265:0
  • Heat an iOpener and thread it through the arms of the Anti-Clamp.

  • You can also use a hair dryer or heat gun—but extreme heat can damage the display and/or internal battery, so proceed with care.

  • Fold the iOpener so it lays on the bottom edge of the phone.

  • Wait one minute to give the adhesive a chance to release and present an opening gap.

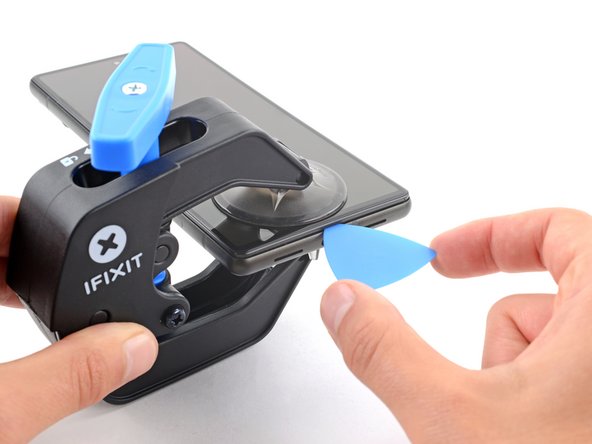
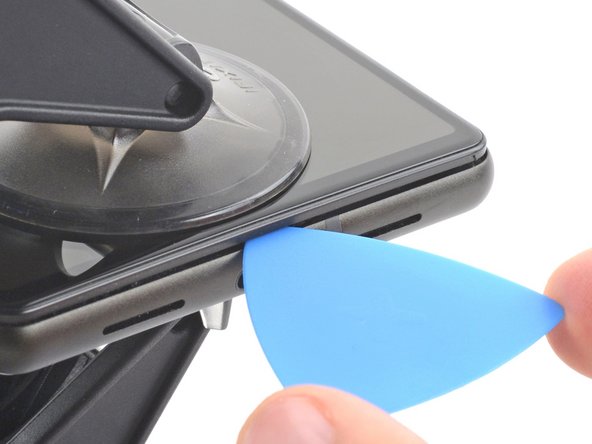
  • Insert an opening pick under the screen frame when the Anti-Clamp creates a large enough gap.

  • If the Anti-Clamp doesn't create a sufficient gap, apply more heat to the area and rotate the handle clockwise half a turn.

  • Don't crank more than a half a turn at a time, and wait one minute between turns. Let the Anti-Clamp and time do the work for you.

  • Skip the next two steps.

iOpener를 가열한 후 안티-클램프의 팔에 끼워 넣으세요.

헤어 드라이어열선총을 사용할 수도 있지만—과도한 열은 디스플레이 및/또는 내부 배터리를 손상할 수 있으므로 주의해서 진행하세요.

iOpener를 접어 휴대폰 하단 가장자리에 놓이도록 하세요.

1분 정도 기다렸다가 접착제가 풀려서 틈이 생길 때까지 기다리세요.

안티-클램프가 충분히 큰 틈을 만들면 스크린 프레임 밑으로 여는 픽을 끼우세요.

안티-클램프가 충분한 틈을 만들지 못하면 해당 부위에 열을 더 가하고 핸들을 시계 방향으로 반 바퀴 돌리세요.

한 번에 반 바퀴 이상 돌리지 말고 매번 돌릴 때마다 1분 정도 기다리세요. 안티-클램프와 시간에 맡기세요.

다음 두 단계는 건너뛰세요.

crwdns2944171:0crwdnd2944171:0crwdnd2944171:0crwdnd2944171:0crwdne2944171:0