crwdns2933423:0crwdne2933423:0

Reemplazo de pantalla y batería de Wahoo Elemnt Roam (WFCC4)

crwdns2936315:0crwdne2936315:0
crwdns2936331:0crwdne2936331:0
crwdns2931653:010crwdne2931653:0
Wahoo Elemnt Roam (WFCC4) Screen and Battery Replacement, Clean up Old Battery Circuit Board: crwdns2935265:00crwdnd2935265:01crwdnd2935265:03crwdne2935265:0 Wahoo Elemnt Roam (WFCC4) Screen and Battery Replacement, Clean up Old Battery Circuit Board: crwdns2935265:00crwdnd2935265:02crwdnd2935265:03crwdne2935265:0 Wahoo Elemnt Roam (WFCC4) Screen and Battery Replacement, Clean up Old Battery Circuit Board: crwdns2935265:00crwdnd2935265:03crwdnd2935265:03crwdne2935265:0
Clean up Old Battery Circuit Board
  • Although the new battery comes with its own circuit board, we'll have to use the old one as an intermediary / extension

  • Remove the remaining pieces of the old battery connectors from the two main pads. Be careful not to rip off the pads from the circuit board.

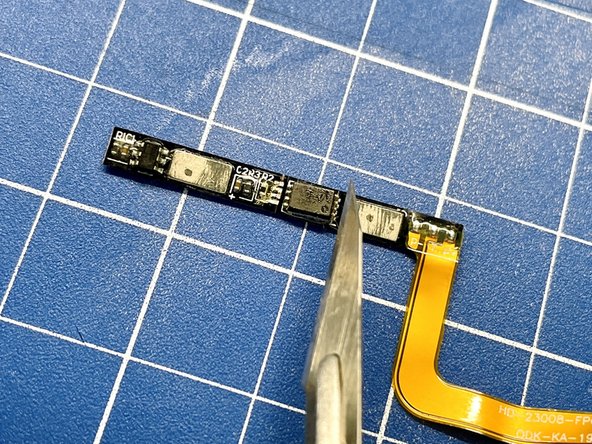
  • To avoid any conflicts between the logic of the old battery's IC and the IC of the new one, we have to remove the old one. Remove the small IC from the circuit board using an exacto knife or similar

  • Use a soldering iron and some soldering wick to remove the remaining solder from the pads for the IC

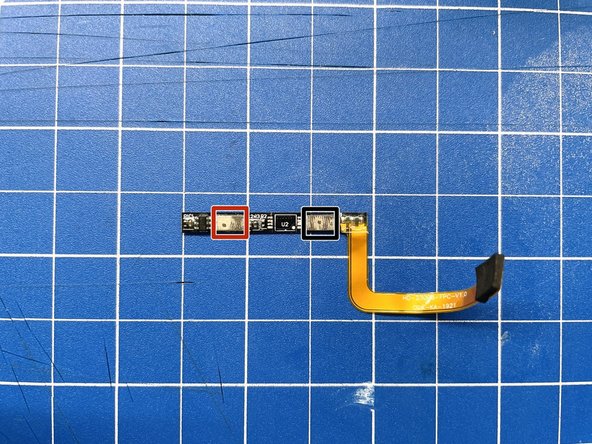
  • Note The pad to the left of the IC (U2) is for the positive side, and the pad to the right of the IC is for the negative side (see last picture for correct orientation)

Aunque la nueva batería viene con su propia placa de circuito, tendremos que utilizar la antigua como intermediaria/extensión.

Quita las piezas restantes de los conectores de batería viejos de las dos almohadillas principales. Ten cuidado de no arrancar las almohadillas de la placa de circuito.

Para evitar conflictos entre la lógica del IC de la batería vieja y el IC de la nueva, tenemos que quitar la vieja. Retire el IC pequeño de la placa de circuito con un cuchillo exacto o similar

Utiliza un soldador y un poco de mecha de soldadura para eliminar la soldadura restante de las almohadillas del IC.

Nota La almohadilla a la izquierda del IC (U2) es para el lado positivo y la almohadilla a la derecha del IC es para el lado negativo (consulte la última imagen para ver la orientación correcta)

crwdns2944171:0crwdnd2944171:0crwdnd2944171:0crwdnd2944171:0crwdne2944171:0