crwdns2933423:0crwdne2933423:0

Nintendo Switch OLEDモデル スクリーンの交換

crwdns2936315:0crwdne2936315:0
crwdns2936323:0crwdne2936323:0
crwdns2931653:04crwdne2931653:0
Nintendo Switch OLED Model Screen Replacement, Insert an opening pick: crwdns2935265:00crwdnd2935265:01crwdnd2935265:03crwdne2935265:0 Nintendo Switch OLED Model Screen Replacement, Insert an opening pick: crwdns2935265:00crwdnd2935265:02crwdnd2935265:03crwdne2935265:0 Nintendo Switch OLED Model Screen Replacement, Insert an opening pick: crwdns2935265:00crwdnd2935265:03crwdnd2935265:03crwdne2935265:0
Insert an opening pick
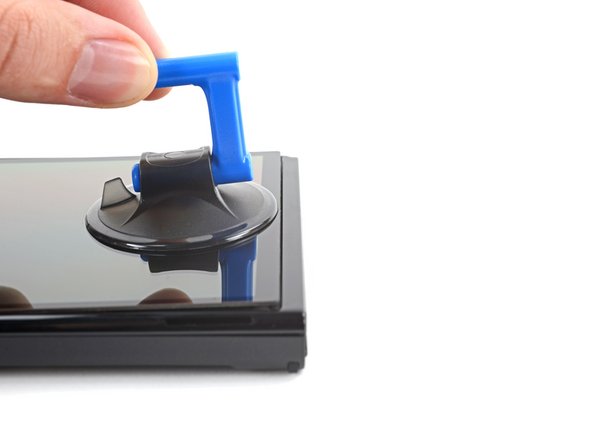
  • Once the screen is warm to touch, apply a suction handle to the bottom edge of the screen and as close to the edge as possible.

  • If your screen is badly cracked, covering it with a layer of clear packing tape may allow the suction cup to adhere. Alternatively, very strong tape may be used instead of the suction handle. If all else fails, you can superglue the suction cup to the screen.

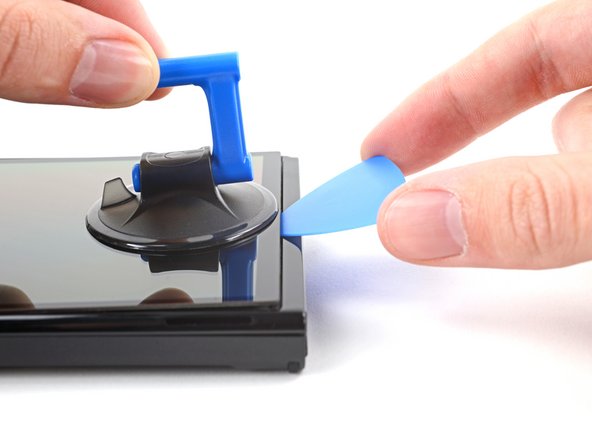
  • Lift the screen with the suction handle to create a small gap between the screen and the frame.

  • Insert an opening pick into the gap between the frame and the screen.

スクリーンを触って温かくなったら、スクリーン下端に一番近い部分に吸盤ハンドルを当てます。

スクリーンの割れがひどい場合は、透明のガムテープを貼っておくと吸盤が吸着することがあります。または、吸盤の代わりに非常に強力なテープを使用することもできます。吸盤をスクリーンに貼り付けるには、瞬間接着剤を使用します。

吸着ハンドルでスクリーンを持ち上げて、スクリーンとフレームの間にわずかな隙間を作ります。

オープニングピックをスクリーンとフレームの間に差し込みます。

crwdns2944171:0crwdnd2944171:0crwdnd2944171:0crwdnd2944171:0crwdne2944171:0