crwdns2933423:0crwdne2933423:0

Nintendo GameCube 光学ドライブアセンブリの交換

crwdns2931529:0crwdnd2931529:0crwdnd2931529:0crwdnd2931529:02crwdnd2931529:0crwdne2931529:0

crwdns2936315:0crwdne2936315:0
crwdns2936323:0crwdne2936323:0
crwdns2931653:05crwdne2931653:0
Nintendo GameCube Optical Drive Assembly Replacement: crwdns2935265:00crwdnd2935265:01crwdnd2935265:03crwdne2935265:0 Nintendo GameCube Optical Drive Assembly Replacement: crwdns2935265:00crwdnd2935265:02crwdnd2935265:03crwdne2935265:0 Nintendo GameCube Optical Drive Assembly Replacement: crwdns2935265:00crwdnd2935265:03crwdnd2935265:03crwdne2935265:0
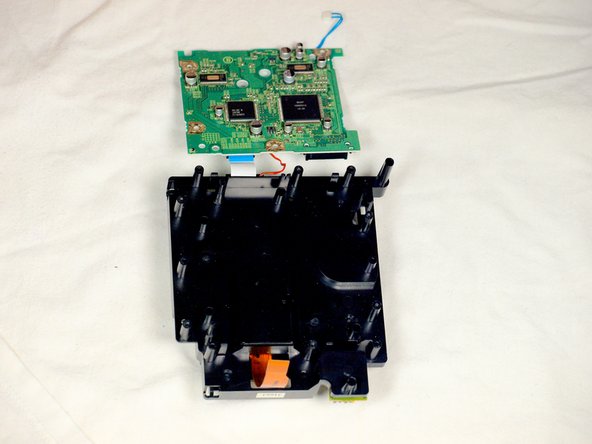
  • Gently lift the metal plate off the drive assembly.

  • Be careful not to sever the red wire or the white ribbon cable still attached to the two halves of the drive assembly.

  • Then, flip the two halves of the drive assembly upside down.

ドライブアセンブリからメタルプレートをゆっくりと持ち上げます。

2つのドライブアセンブリに取り付けられている赤いワイヤーや白いリボンケーブルを切断しないように注意してください。

次に、ドライブアセンブリの2つの部分を上下逆にします。

crwdns2944171:0crwdnd2944171:0crwdnd2944171:0crwdnd2944171:0crwdne2944171:0