crwdns2933423:0crwdne2933423:0

Sustitución del Conjunto de Unidad Óptica de la Nintendo GameCube

crwdns2931529:0crwdnd2931529:0crwdnd2931529:0crwdnd2931529:02crwdnd2931529:0crwdne2931529:0

crwdns2936315:0crwdne2936315:0
crwdns2936331:0crwdne2936331:0
crwdns2931653:03crwdne2931653:0
Nintendo GameCube Optical Drive Assembly Replacement: crwdns2935265:00crwdnd2935265:01crwdnd2935265:03crwdne2935265:0 Nintendo GameCube Optical Drive Assembly Replacement: crwdns2935265:00crwdnd2935265:02crwdnd2935265:03crwdne2935265:0 Nintendo GameCube Optical Drive Assembly Replacement: crwdns2935265:00crwdnd2935265:03crwdnd2935265:03crwdne2935265:0
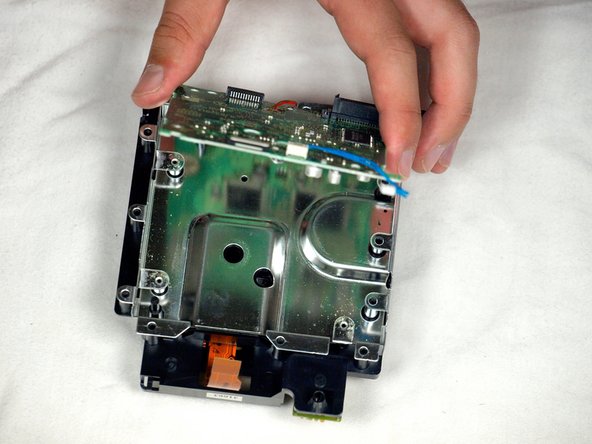
  • Release the small clip holding the board down.

  • Gently remove the circuit board (the large green square) as shown in the three pictures.

  • DO NOT SEPARATE the red wire or the white ribbon cable connecting the circuit board to the metal plate.

  • Red Wire

  • White ribbon Cable

Suelta el pequeño clip que sujeta la placa hacia abajo.

Retira con cuidado la placa de circuito (el cuadrado verde grande) como se muestra en las tres imágenes.

NO SEPARES el cable rojo o el cable plano blanco que conecta la placa de circuito a la placa de metal.

Cable rojo

Cable de cinta blanca

crwdns2944171:0crwdnd2944171:0crwdnd2944171:0crwdnd2944171:0crwdne2944171:0