crwdns2931529:0crwdnd2931529:0crwdnd2931529:0crwdnd2931529:04crwdnd2931529:0crwdne2931529:0
crwdns2935425:01crwdne2935425:0
crwdns2931653:01crwdne2931653:0

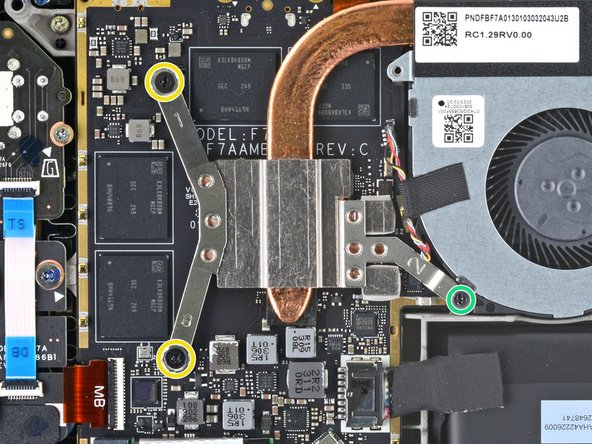


Remove the heatsink screws
-
For original Steam Decks: Use a Phillips driver to loosen and remove the two screws securing the heatsink to the motherboard:
-
One captive 3.5 mm screw
-
One 3.4 mm screw
-
For refreshed Steam Decks: Use a Phillips driver to remove the three screws securing the heatsink to the motherboard:
-
Two 2.9 mm screws
-
One 3.7 mm screw
crwdns2944171:0crwdnd2944171:0crwdnd2944171:0crwdnd2944171:0crwdne2944171:0