crwdns2933423:0crwdne2933423:0

Google Pixel 6 Pro スクリーン交換

crwdns2931529:0crwdnd2931529:0crwdnd2931529:0crwdnd2931529:06crwdnd2931529:0crwdne2931529:0

crwdns2935425:016crwdne2935425:0

crwdns2936315:0crwdne2936315:0
crwdns2936323:0crwdne2936323:0
crwdns2931653:016crwdne2931653:0
Google Pixel 6 Pro Screen Replacement, Remove the screen: crwdns2935265:00crwdnd2935265:01crwdnd2935265:02crwdne2935265:0 Google Pixel 6 Pro Screen Replacement, Remove the screen: crwdns2935265:00crwdnd2935265:02crwdnd2935265:02crwdne2935265:0
Remove the screen
  • Remove the screen.

  • During reassembly:

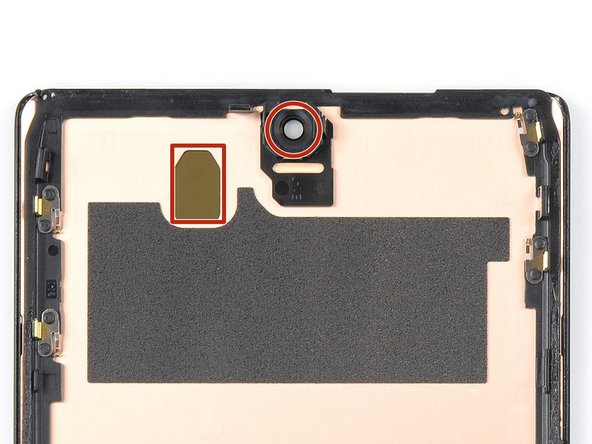
  • If you replaced the screen, check the screen's front-facing camera hole and sensor cutout for any protective liners. Remove these liners before you close the phone up.

  • Remember to reinstall the display cable bracket.

  • This is a good point to test your phone before sealing it up. Temporarily connect your screen, power on your phone, and make sure it works as expected. Before continuing with reassembly, power off your phone and disconnect the screen.

  • Follow this guide if you're using custom-cut adhesives for your device.

  • Follow this guide in case you're using a pre-cut adhesive card.

  • If you're installing a new screen, follow this guide to calibrate the fingerprint sensor.

スクリーンを取り外します。

再組立ての際、次のように作業を行います。

スクリーンを交換した場合、スクリーンのフロントカメラ用の穴とセンサーの切り込みに保護用ライナーがないか確認します。デバイスを密封する前に、これらのライナーを取り除いてください。

ディスプレイケーブルブラケットを忘れずに再装着してください。

ここで、デバイスを接着剤で密封する前に、修理後のデバイスをテストする良いポイントです。スクリーンを一時的に接続し、デバイスの電源を入れ、期待通りに動作することを確認します。再組み立てに戻る前に、携帯電話の電源を切り、スクリーンを外します。

このガイドを参照して 、カスタムカットされた接着剤をデバイスに装着してください。

プレカットされた接着剤カードを使用する場合は、このガイドを参照してください。

新しいスクリーンをインストールする場合、このガイドを参照して、指紋センサーをキャリブレーションしてください。

crwdns2944171:0crwdnd2944171:0crwdnd2944171:0crwdnd2944171:0crwdne2944171:0