crwdns2933423:0crwdne2933423:0

Reemplazo de la pantalla del Google Pixel 6

crwdns2931529:0crwdnd2931529:0crwdnd2931529:0crwdnd2931529:06crwdnd2931529:0crwdne2931529:0

crwdns2936315:0crwdne2936315:0
crwdns2936331:0crwdne2936331:0
crwdns2931653:04crwdne2931653:0
Google Pixel 6 Screen Replacement: crwdns2935265:00crwdnd2935265:01crwdnd2935265:03crwdne2935265:0 Google Pixel 6 Screen Replacement: crwdns2935265:00crwdnd2935265:02crwdnd2935265:03crwdne2935265:0 Google Pixel 6 Screen Replacement: crwdns2935265:00crwdnd2935265:03crwdnd2935265:03crwdne2935265:0
  • Heat an iOpener and thread it through the arms of the Anti-Clamp.

  • You can also use a hair dryer or heat gun—but extreme heat can damage the display and/or internal battery, so proceed with care.

  • Fold the iOpener so it lays on the bottom edge of the phone.

  • Wait one minute to give the adhesive a chance to release and present an opening gap.

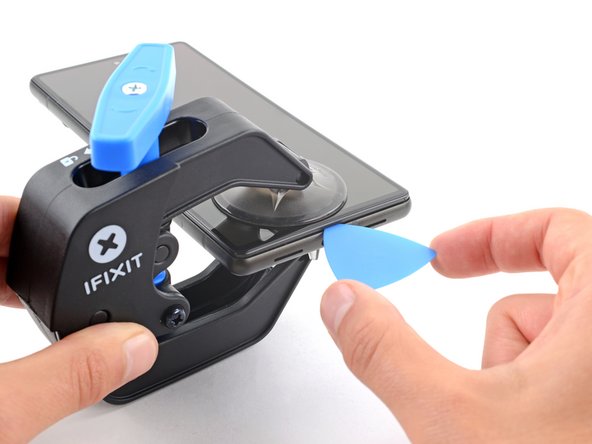
  • Insert an opening pick under the screen frame when the Anti-Clamp creates a large enough gap.

  • If the Anti-Clamp doesn't create a sufficient gap, apply more heat to the area and rotate the handle clockwise half a turn.

  • Don't crank more than a half a turn at a time, and wait one minute between turns. Let the Anti-Clamp and time do the work for you.

  • Skip the next two steps.

Calienta el iOpener y enróscalo a lo largo de los brazos del Anti-Clamp.

Puedes usar, una secadora de cabello, pistola de calor, o una placa caliente —pero el calor extremo puede dañar el display y/o la batería interna, así que procede con precaución.

Dobla el iOpener para que lo coloques en el borde inferior del teléfono.

Espera un minuto para dar al adhesivo la oportunidad de soltarse y presentar un hueco de apertura.

Inserta una púa de apertura bajo el marco de la mampara cuando el Anti-Clamp cree un hueco lo suficientemente grande.

Si el Anti-Clamp no crea un hueco suficiente, apli más calor en la zona y gire el mango media vuelta en el sentido de las agujas del reloj.

No des más de media vuelta cada vez y espera un minuto entre vuelta y vuelta. Deja que el Anti-Clamp y el tiempo hagan el trabajo por ti.

Sáltate los dos pasos siguientes.

crwdns2944171:0crwdnd2944171:0crwdnd2944171:0crwdnd2944171:0crwdne2944171:0