crwdns2933423:0crwdne2933423:0

Desmontaje de NEC PC-FX

crwdns2936315:0crwdne2936315:0
crwdns2936331:0crwdne2936331:0
crwdns2931653:05crwdne2931653:0
NEC PC-FX Teardown, Remove the CD Drive: crwdns2935265:00crwdnd2935265:01crwdnd2935265:03crwdne2935265:0 NEC PC-FX Teardown, Remove the CD Drive: crwdns2935265:00crwdnd2935265:02crwdnd2935265:03crwdne2935265:0 NEC PC-FX Teardown, Remove the CD Drive: crwdns2935265:00crwdnd2935265:03crwdnd2935265:03crwdne2935265:0
Remove the CD Drive
  • Now turn your attention to the CD drive. Lift up the tabs holding the drive ribbon connector at the left and the power connector at the right (if you haven't already).

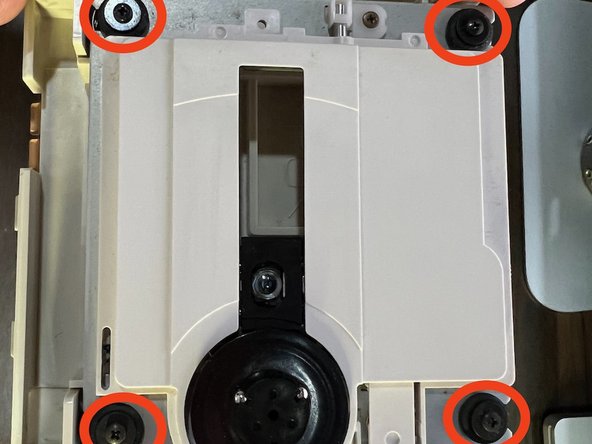
  • Unscrew the four small Philips screws on each post holding up the drive (encircled in the second pictur). You may now lift up the drive and remove the springs on each post underneath.

  • There will be a transparent plastic sheet holding the ribbon connector in place. I strongly suggest totally removing this, as this will make plugging back the drive much easier.

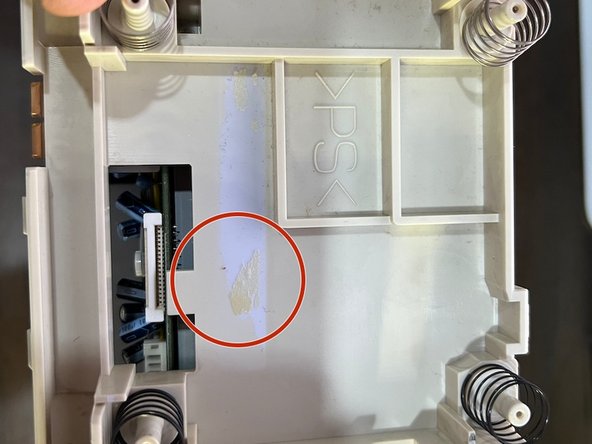
  • The third picture shows the remaining adhesive after from removing the clear plastic sheet.

Ahora dirige tu atención a la unidad de CD. Levanta las pestañas que sujetan el conector de cinta de la unidad a la izquierda y el conector de alimentación a la derecha (si aún no lo has hecho).

Desatornilla los cuatro tornillos Philips pequeños en cada poste que sostienen la unidad (encerrados en la segunda imagen). Ahora puedes levantar la unidad y quitar los resortes de cada poste debajo.

Habrá una lámina de plástico transparente que sujetará el conector de cinta en su lugar. Recomiendo encarecidamente eliminar esto por completo, ya que esto hará que volver a conectar la unidad sea mucho más fácil.

La tercera imagen muestra el adhesivo restante después de quitar la lámina de plástico transparente.

crwdns2944171:0crwdnd2944171:0crwdnd2944171:0crwdnd2944171:0crwdne2944171:0