crwdns2933423:0crwdne2933423:0

Microsoft Surface Pro X öffnen

crwdns2931529:0crwdnd2931529:0crwdnd2931529:0crwdnd2931529:019crwdnd2931529:0crwdne2931529:0

crwdns2936315:0crwdne2936315:0
crwdns2936319:0crwdne2936319:0
crwdns2931653:04crwdne2931653:0
Microsoft Surface Pro X Opening Procedure, Create a gap between the screen and frame: crwdns2935265:00crwdnd2935265:01crwdnd2935265:03crwdne2935265:0 Microsoft Surface Pro X Opening Procedure, Create a gap between the screen and frame: crwdns2935265:00crwdnd2935265:02crwdnd2935265:03crwdne2935265:0 Microsoft Surface Pro X Opening Procedure, Create a gap between the screen and frame: crwdns2935265:00crwdnd2935265:03crwdnd2935265:03crwdne2935265:0
Create a gap between the screen and frame
  • Don't insert the opening pick more than 3 mm while cutting through the adhesive on the right, bottom, and left edge.

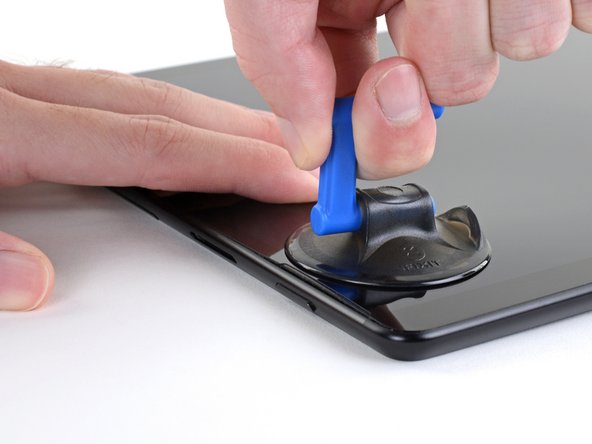
  • Lift up on the suction cup to create a gap between the screen and the frame.

  • The gap only needs to be wide enough to slide in an opening pick.

  • Insert an opening pick about 2 mm into the gap. Leave the opening pick in the gap to prevent it from resealing.

Setze das Plektrum nicht tiefer als 3 mm ein, wenn du den Kleber an der unteren, rechten und linken Kante auftrennst.

Ziehe den Saugheber nach oben, bis ein Spalt zwischen dem Display und dem Rahmen entstanden ist.

Der Spalt muss nur so groß sein, dass ein Plektrum hineinpasst.

Setze ein Plektrum 2 mm tief in den Spalt ein. Lasse das Plektrum stecken, damit sich der Kleber nicht wieder verbinden kann.

crwdns2944171:0crwdnd2944171:0crwdnd2944171:0crwdnd2944171:0crwdne2944171:0