crwdns2933423:0crwdne2933423:0

Microsoft Surface Pro X Opening Procedure

crwdns2862623:0crwdne2862623:0
crwdns2942641:0crwdne2942641:0

crwdns2942213:0crwdne2942213:0

  1. Microsoft Surface Pro X Opening Procedure, Open the kickstand: crwdns2935265:01crwdnd2935265:01crwdnd2935265:02crwdne2935265:0 Microsoft Surface Pro X Opening Procedure, Open the kickstand: crwdns2935265:01crwdnd2935265:02crwdnd2935265:02crwdne2935265:0
    • Make sure your Surface Pro X is turned off, and laying screen-side down on a soft surface.

    • After turning off your device, make sure to remove the SSD from the Surface before starting any repairs. This will disconnect the battery and prevent damage to the device.

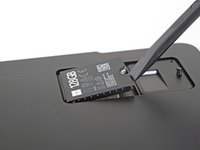
    • Lift the kickstand to at least a 90° angle, so that it is perpendicular to the Surface's screen. The further you open the hinge, the easier it is to access the SSD and SIM card door.

  2. Microsoft Surface Pro X Opening Procedure, Open the SSD and SIM card door: crwdns2935265:02crwdnd2935265:01crwdnd2935265:02crwdne2935265:0 Microsoft Surface Pro X Opening Procedure, Open the SSD and SIM card door: crwdns2935265:02crwdnd2935265:02crwdnd2935265:02crwdne2935265:0
    • Insert a SIM card eject tool or a paperclip into the small hole in the bottom right corner of the SSD and SIM card door, located near the bottom right corner of the Surface.

    • Press firmly to open the door.
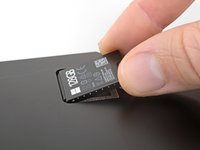
  3. Microsoft Surface Pro X Opening Procedure, Remove the SSD and SIM card door: crwdns2935265:03crwdnd2935265:01crwdnd2935265:01crwdne2935265:0
  4. Microsoft Surface Pro X Opening Procedure, Remove the SSD screw: crwdns2935265:04crwdnd2935265:01crwdnd2935265:01crwdne2935265:0
    • Use a T3 Torx screwdriver to remove the 2.4 mm screw securing the SSD.

  5. Microsoft Surface Pro X Opening Procedure, Remove the SSD: crwdns2935265:05crwdnd2935265:01crwdnd2935265:03crwdne2935265:0 Microsoft Surface Pro X Opening Procedure, Remove the SSD: crwdns2935265:05crwdnd2935265:02crwdnd2935265:03crwdne2935265:0 Microsoft Surface Pro X Opening Procedure, Remove the SSD: crwdns2935265:05crwdnd2935265:03crwdnd2935265:03crwdne2935265:0
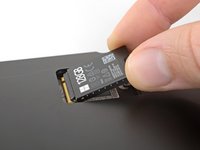
    • Use your finger or a spudger to lift the SSD just enough that it clears the edges of its recess.

    • Don't lift the SSD more than you have to—doing so may damage the SSD or its socket.

    • Gently pull the SSD straight out of its socket.

    • When reinstalling the SSD, be sure it is properly seated before reinstalling its retaining screw.

  6. Microsoft Surface Pro X Opening Procedure, Tape the screen: crwdns2935265:06crwdnd2935265:01crwdnd2935265:03crwdne2935265:0 Microsoft Surface Pro X Opening Procedure, Tape the screen: crwdns2935265:06crwdnd2935265:02crwdnd2935265:03crwdne2935265:0 Microsoft Surface Pro X Opening Procedure, Tape the screen: crwdns2935265:06crwdnd2935265:03crwdnd2935265:03crwdne2935265:0
    • Wear safety glasses to protect your eyes, and be careful not to damage the LCD screen.

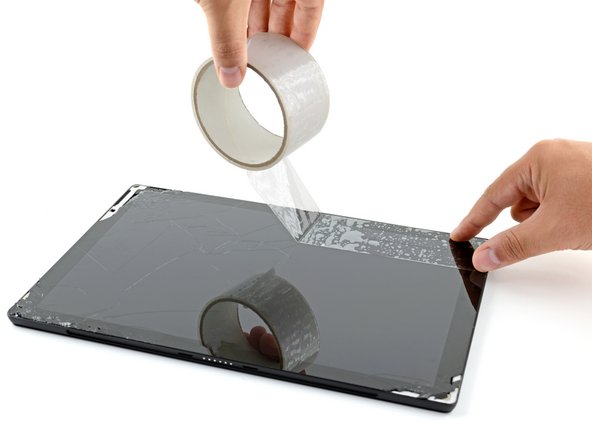
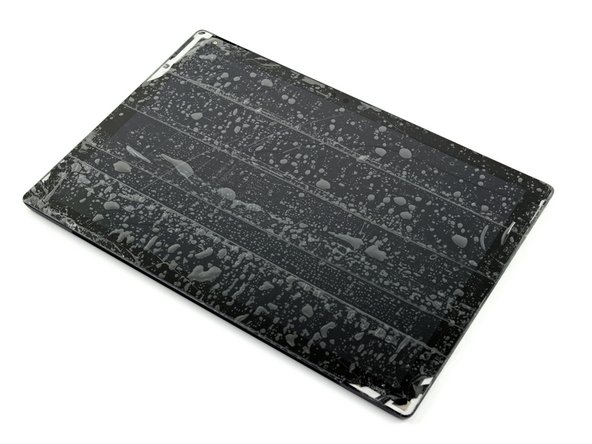
    • If your display glass is cracked, keep further breakage contained and prevent bodily harm during your repair by taping the glass.

    • Lay overlapping strips of clear packing tape over the Surface’s display until the whole face is covered.

    • This will keep glass shards contained and provide structural integrity when prying and lifting the display.

    • Do your best to follow the rest of the guide as described. However, once the glass is broken, it will likely continue to crack as you work, and you may need to use a metal prying tool to scoop the glass out.

  7. Microsoft Surface Pro X Opening Procedure, Apply a suction cup to the screen: crwdns2935265:07crwdnd2935265:01crwdnd2935265:02crwdne2935265:0 Microsoft Surface Pro X Opening Procedure, Apply a suction cup to the screen: crwdns2935265:07crwdnd2935265:02crwdnd2935265:02crwdne2935265:0
    • Wear safety glasses during the screen removal procedure in case the glass shatters while you're working.

    • There is a significant chance that you may break the unreinforced and fragile display panel during this procedure. Be sure to work slowly and be extremely careful while slicing through the adhesive.

    • Place your tablet on your work surface so that the screen is facing up.

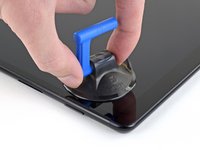
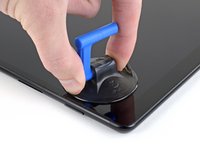
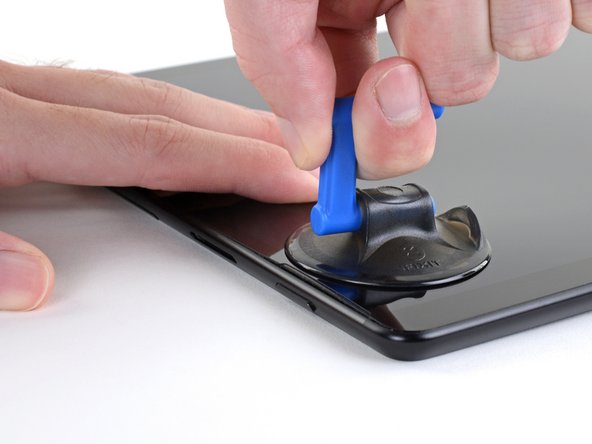
    • Apply a suction cup to the screen next to the right speaker grille.

  8. Microsoft Surface Pro X Opening Procedure, Secure the tablet: crwdns2935265:08crwdnd2935265:01crwdnd2935265:01crwdne2935265:0
    • Place your hand on the screen next to the suction cup to secure the Surface while you lift up the screen.

  9. Microsoft Surface Pro X Opening Procedure, Create a gap between the screen and frame: crwdns2935265:09crwdnd2935265:01crwdnd2935265:03crwdne2935265:0 Microsoft Surface Pro X Opening Procedure, Create a gap between the screen and frame: crwdns2935265:09crwdnd2935265:02crwdnd2935265:03crwdne2935265:0 Microsoft Surface Pro X Opening Procedure, Create a gap between the screen and frame: crwdns2935265:09crwdnd2935265:03crwdnd2935265:03crwdne2935265:0
    • Don't insert the opening pick more than 3 mm while cutting through the adhesive on the right, bottom, and left edge.

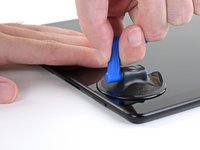
    • Lift up on the suction cup to create a gap between the screen and the frame.

    • The gap only needs to be wide enough to slide in an opening pick.

    • Insert an opening pick about 2 mm into the gap. Leave the opening pick in the gap to prevent it from resealing.

  10. Microsoft Surface Pro X Opening Procedure, Cut through the screen adhesive: crwdns2935265:010crwdnd2935265:01crwdnd2935265:02crwdne2935265:0 Microsoft Surface Pro X Opening Procedure, Cut through the screen adhesive: crwdns2935265:010crwdnd2935265:02crwdnd2935265:02crwdne2935265:0
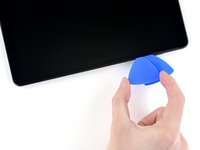
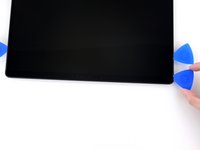
    • Insert a second opening pick into the gap between the screen and the frame.

    • Slide the pick down the right edge of the Surface to slice through the adhesive under the screen.

    • Leave this opening pick in the right edge to prevent the adhesive from resealing.

  11. Microsoft Surface Pro X Opening Procedure: crwdns2935265:011crwdnd2935265:01crwdnd2935265:03crwdne2935265:0 Microsoft Surface Pro X Opening Procedure: crwdns2935265:011crwdnd2935265:02crwdnd2935265:03crwdne2935265:0 Microsoft Surface Pro X Opening Procedure: crwdns2935265:011crwdnd2935265:03crwdnd2935265:03crwdne2935265:0
    • Don't insert the pick more than 3 mm while cutting through the screen adhesive on the bottom edge or you may damage delicate components on the screen.

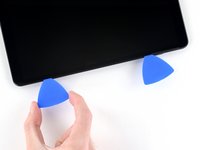
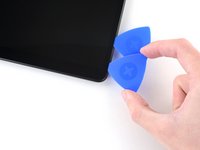
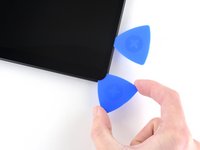
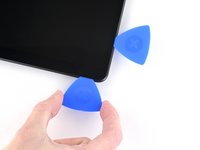
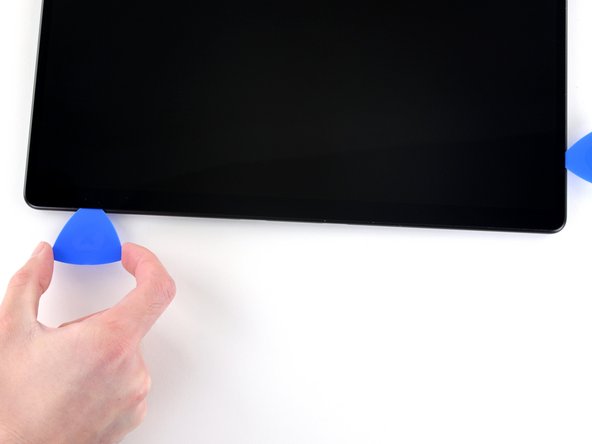
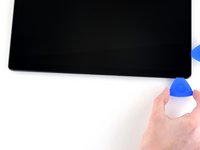
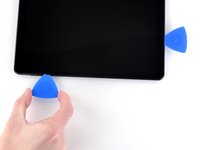
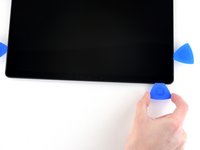
    • Insert a third opening pick into the bottom right corner and slide it around the corner toward the bottom edge.

  12. Microsoft Surface Pro X Opening Procedure: crwdns2935265:012crwdnd2935265:01crwdnd2935265:02crwdne2935265:0 Microsoft Surface Pro X Opening Procedure: crwdns2935265:012crwdnd2935265:02crwdnd2935265:02crwdne2935265:0
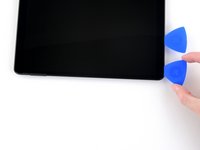
    • Slide the pick along the bottom edge of the Surface to cut through the screen adhesive.

    • Leave this pick in the bottom edge to prevent the adhesive from resealing.

  13. Microsoft Surface Pro X Opening Procedure: crwdns2935265:013crwdnd2935265:01crwdnd2935265:03crwdne2935265:0 Microsoft Surface Pro X Opening Procedure: crwdns2935265:013crwdnd2935265:02crwdnd2935265:03crwdne2935265:0 Microsoft Surface Pro X Opening Procedure: crwdns2935265:013crwdnd2935265:03crwdnd2935265:03crwdne2935265:0
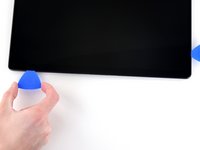
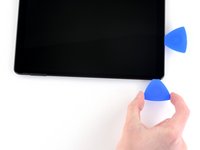
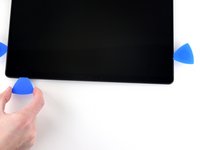
    • Insert a fourth opening pick into the bottom left corner and slide it around the corner toward the left edge.

    • Slide the pick along the left edge of the Surface to cut through the screen adhesive.

    • Leave this pick in the left edge to prevent the adhesive from resealing.

  14. Microsoft Surface Pro X Opening Procedure: crwdns2935265:014crwdnd2935265:01crwdnd2935265:03crwdne2935265:0 Microsoft Surface Pro X Opening Procedure: crwdns2935265:014crwdnd2935265:02crwdnd2935265:03crwdne2935265:0 Microsoft Surface Pro X Opening Procedure: crwdns2935265:014crwdnd2935265:03crwdnd2935265:03crwdne2935265:0
    • Don't insert the opening pick more than 10 mm while cutting through the adhesive on the top edge. Don't insert the pick more than 3 mm near the speaker grille.

    • Insert a fifth opening pick into the top left corner and slide it around the corner toward the top edge.

    • Slide the pick along the top edge of the Surface to cut through the screen adhesive.

  15. Microsoft Surface Pro X Opening Procedure, Open the Surface: crwdns2935265:015crwdnd2935265:01crwdnd2935265:03crwdne2935265:0 Microsoft Surface Pro X Opening Procedure, Open the Surface: crwdns2935265:015crwdnd2935265:02crwdnd2935265:03crwdne2935265:0 Microsoft Surface Pro X Opening Procedure, Open the Surface: crwdns2935265:015crwdnd2935265:03crwdnd2935265:03crwdne2935265:0
    • Do not remove the screen yet. It is still connected to the motherboard by the display cable. Keep the screen as close as possible to the Surface's frame to avoid straining the display cable.

    • Avoid hitting the battery with the screen during this procedure. A punctured or bent battery may leak dangerous chemicals or cause a thermal event.

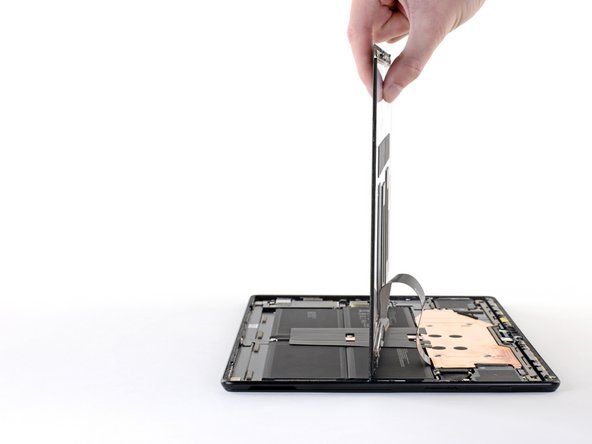
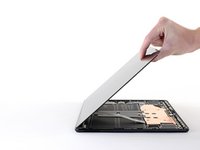
    • Lift up the top edge of the screen so that it is at a 30° angle with the frame.

    • If you encounter any resistance, stop and check that all the adhesive is separated. Use an opening pick to cut through any remaining adhesive.

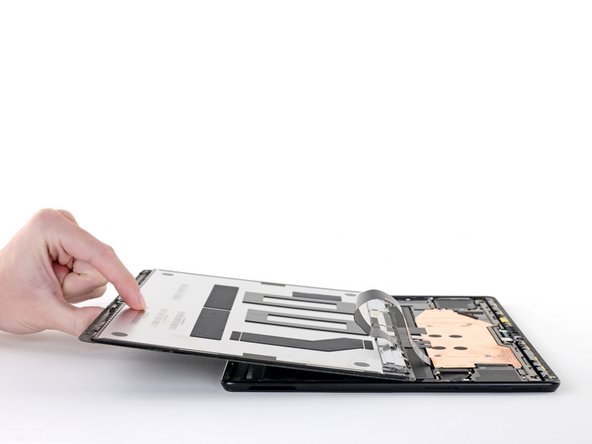
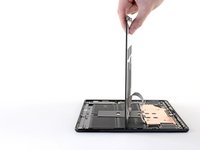
    • Rotate the screen so that its bottom edge is in the middle of the frame. The screen should be perpendicular to the frame.

    • Rotate the screen 90° so that it is facing down. Place the screen on the frame.

crwdns2915888:0crwdne2915888:0

To reassemble your device, follow these instructions in reverse order.

Kyle Smith

crwdns2935283:002/01/21crwdne2935283:0

45,392 crwdns2915208:0crwdne2915208:0

crwdns2935297:0123crwdne2935297:0

crwdns2947412:00crwdne2947412:0

crwdns2917038:0crwdne2917038:0

crwdns2936625:0crwdne2936625:0:

crwdns2936751:024crwdne2936751:0 0

crwdns2936753:07crwdne2936753:0 0

crwdns2936753:030crwdne2936753:0 5

crwdns2942667:0crwdne2942667:0 52