crwdns2933423:0crwdne2933423:0

Acer Chromebook 11 C732 Teardown

crwdns2936315:0crwdne2936315:0
crwdns2936331:0crwdne2936331:0
crwdns2931653:020crwdne2931653:0
Acer Chromebook 11 C732 Teardown: crwdns2935265:00crwdnd2935265:01crwdnd2935265:03crwdne2935265:0 Acer Chromebook 11 C732 Teardown: crwdns2935265:00crwdnd2935265:02crwdnd2935265:03crwdne2935265:0 Acer Chromebook 11 C732 Teardown: crwdns2935265:00crwdnd2935265:03crwdnd2935265:03crwdne2935265:0
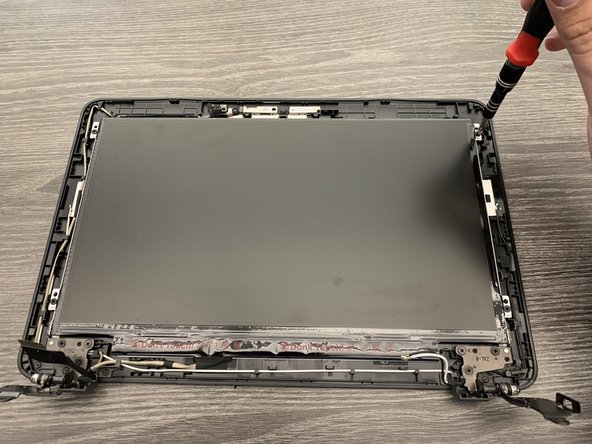
  • With the bezel removed, we can start working on getting our screen out.

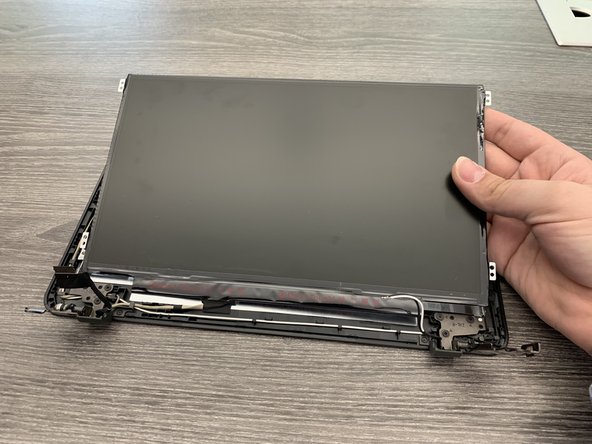
  • On this model, there are only 4 Phillips head screws holding the screen in place. Once these screws are taken out, we will need to flip the screen on its front.

  • The screen is still being held in place by the display cable behind the screen.

crwdns2935429:0crwdne2935429:0

crwdns2935429:0crwdne2935429:0

crwdns2935429:0crwdne2935429:0

crwdns2944171:0crwdnd2944171:0crwdnd2944171:0crwdnd2944171:0crwdne2944171:0