crwdns2933423:0crwdne2933423:0

SATLLA 2 DIY KIT Assembly

crwdns2936315:0crwdne2936315:0
crwdns2936321:0crwdne2936321:0
crwdns2931653:014crwdne2931653:0
SATLLA 2 DIY KIT Assembly, RPI Board integration part - I: crwdns2935265:00crwdnd2935265:01crwdnd2935265:03crwdne2935265:0 SATLLA 2 DIY KIT Assembly, RPI Board integration part - I: crwdns2935265:00crwdnd2935265:02crwdnd2935265:03crwdne2935265:0 SATLLA 2 DIY KIT Assembly, RPI Board integration part - I: crwdns2935265:00crwdnd2935265:03crwdnd2935265:03crwdne2935265:0
RPI Board integration part - I
  • Connect RPI-M cable to the marked red square JST housing.

  • Connect 2 SOLAR cable's to the marked blue square JST housing.

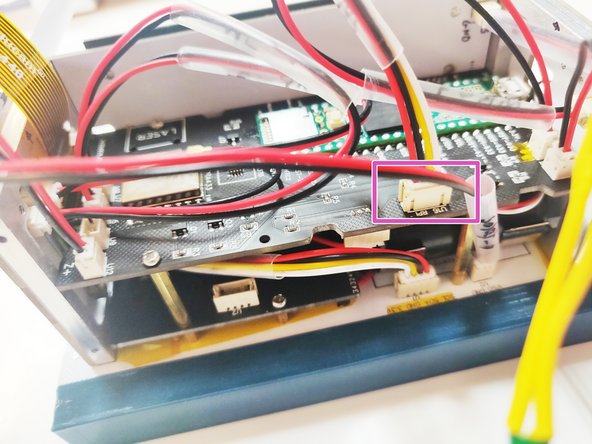
  • On the Main Board connect the other side of the RPI-M cable to the pink square.

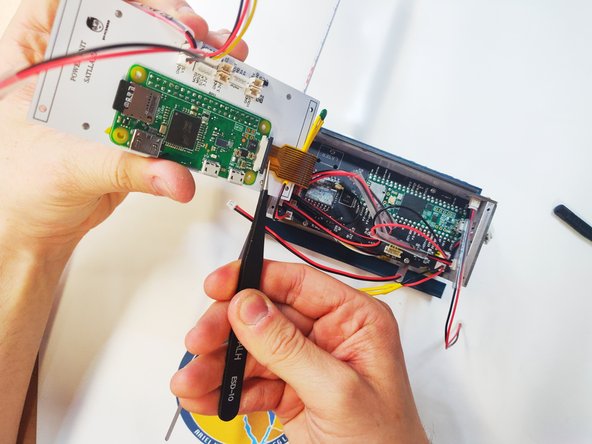
  • Cautiously connect the ribbon cable to the RPI camera socket. NOTE: the socket is fragile.

crwdns2935429:0crwdne2935429:0

crwdns2935429:0crwdne2935429:0

crwdns2935429:0crwdne2935429:0

crwdns2935429:0crwdne2935429:0

crwdns2944171:0crwdnd2944171:0crwdnd2944171:0crwdnd2944171:0crwdne2944171:0