crwdns2935425:013crwdne2935425:0
crwdns2931653:013crwdne2931653:0

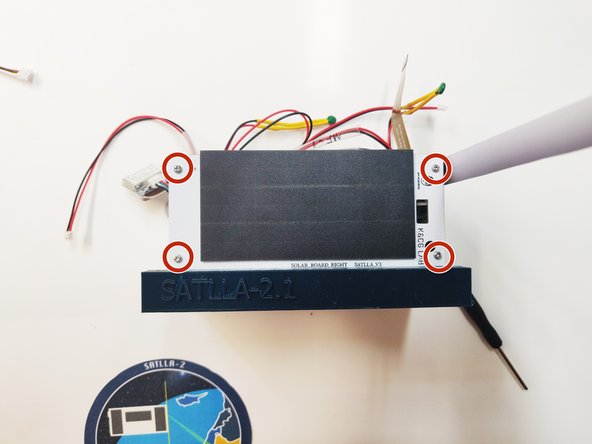


Right Board integration
-
Place the Right Board on the right side of the satellite. NOTE: the right side is where the "TEENSY_USB" square cut on the Back Board is close to.
-
Take 4 M2x5mm bolts and with a Phillips screwdriver tight all 4 bolts. NOTE: (don't over tight).
crwdns2944171:0crwdnd2944171:0crwdnd2944171:0crwdnd2944171:0crwdne2944171:0