crwdns2933423:0crwdne2933423:0

iPad Air 3のロジックボードの交換

crwdns2931527:0crwdnd2931527:0crwdnd2931527:0crwdnd2931527:0crwdne2931527:0

crwdns2936315:0crwdne2936315:0
crwdns2936323:0crwdne2936323:0
crwdns2931653:07crwdne2931653:0
iPad Air 3 Logic Board Replacement, Pry up the logic board shield: crwdns2935265:00crwdnd2935265:01crwdnd2935265:03crwdne2935265:0 iPad Air 3 Logic Board Replacement, Pry up the logic board shield: crwdns2935265:00crwdnd2935265:02crwdnd2935265:03crwdne2935265:0 iPad Air 3 Logic Board Replacement, Pry up the logic board shield: crwdns2935265:00crwdnd2935265:03crwdnd2935265:03crwdne2935265:0
Pry up the logic board shield
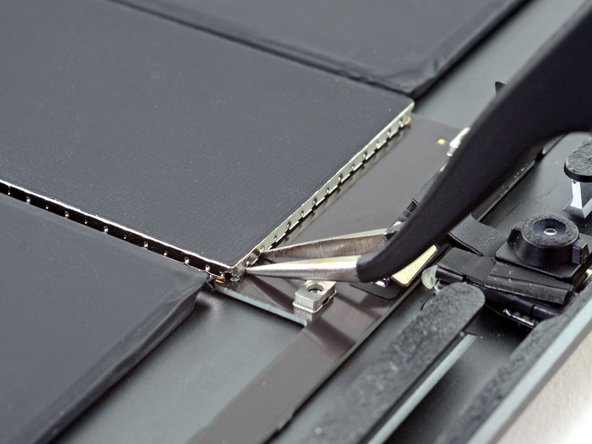
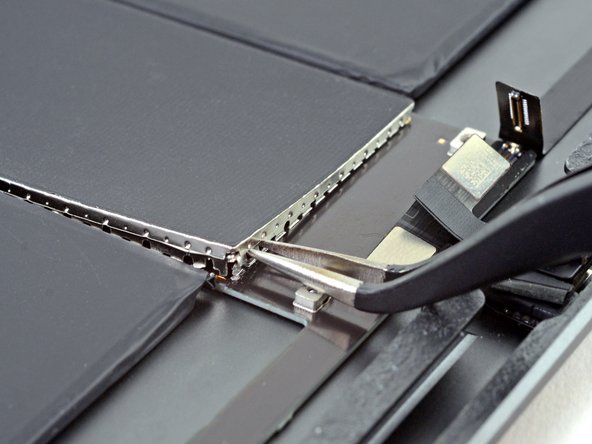
  • Insert the tips of a pair of tweezers into the gaps under the the logic board shield on the upper right corner.

  • Take care not to puncture or bend the battery with your tool—a punctured or bent battery may leak dangerous chemicals or cause a thermal event.

  • Pry up slightly to loosen the logic board shield.

  • Pivot the tweezers on the screw boss to avoid damaging the press connectors.

ピンセットの先端を、ロジックボードシールドの右上の角の下にある隙間に差し込みます。

ピンセットの先端でバッテリーに穴を開けたり変形させたりしないように気をつけてください。穴が空いたり破損した場合、有害な化学物質が漏れたり、発熱したりする場合があります。

少しこじり上げて、ロジックボードシールドの固定を外してください。

ピンセットをネジ柱の上を軸にして動かすことで、プレスコネクタの破損を防いで下さい。

crwdns2944171:0crwdnd2944171:0crwdnd2944171:0crwdnd2944171:0crwdne2944171:0