crwdns2933423:0crwdne2933423:0

iPad Air 3 Logic Board tauschen

crwdns2931527:0crwdnd2931527:0crwdnd2931527:0crwdnd2931527:0crwdne2931527:0

crwdns2936315:0crwdne2936315:0
crwdns2936319:0crwdne2936319:0
crwdns2931653:07crwdne2931653:0
iPad Air 3 Logic Board Replacement, Pry up the logic board shield: crwdns2935265:00crwdnd2935265:01crwdnd2935265:03crwdne2935265:0 iPad Air 3 Logic Board Replacement, Pry up the logic board shield: crwdns2935265:00crwdnd2935265:02crwdnd2935265:03crwdne2935265:0 iPad Air 3 Logic Board Replacement, Pry up the logic board shield: crwdns2935265:00crwdnd2935265:03crwdnd2935265:03crwdne2935265:0
Pry up the logic board shield
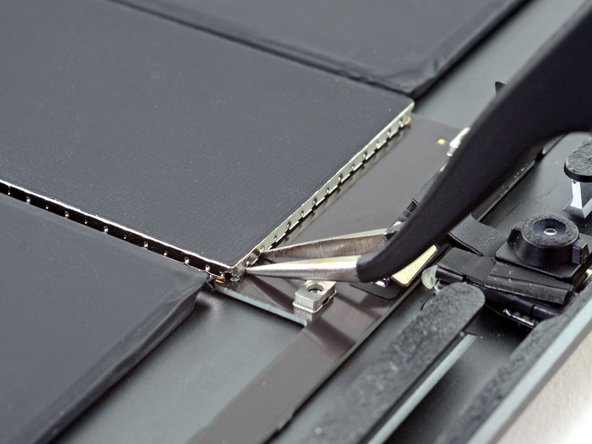
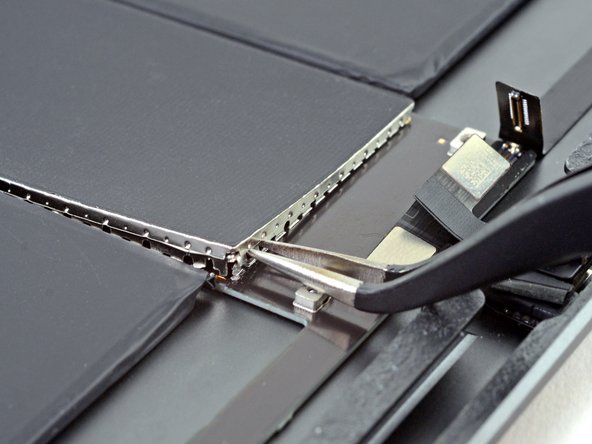
  • Insert the tips of a pair of tweezers into the gaps under the the logic board shield on the upper right corner.

  • Take care not to puncture or bend the battery with your tool—a punctured or bent battery may leak dangerous chemicals or cause a thermal event.

  • Pry up slightly to loosen the logic board shield.

  • Pivot the tweezers on the screw boss to avoid damaging the press connectors.

Setze die Spitzen einer Pinzette in die Spalten unter der Logic Board Abdeckung in der oberen rechten Ecke.

Achte darauf, den Akku nicht mit deinem Werkzeug anzustechen oder zu verbiegen. Aus einem beschädigtem Akku können gefährliche Chemikalien austreten, und er kann sich entzünden oder sogar explodieren.

Heble leicht nach oben, um die Logic Board Abschirmung zu lösen.

Benutze den Schraubbolzen als Hebelpunkt für die Pinzette, um die Druckstecker nicht zu beschädigen.

crwdns2944171:0crwdnd2944171:0crwdnd2944171:0crwdnd2944171:0crwdne2944171:0