crwdns2933423:0crwdne2933423:0

Microsoft Surface Laptop 3 15インチ バッテリーの交換

crwdns2931527:0crwdnd2931527:0crwdnd2931527:0crwdnd2931527:0crwdne2931527:0

crwdns2936315:0crwdne2936315:0
crwdns2936323:0crwdne2936323:0
crwdns2931653:05crwdne2931653:0
Microsoft Surface Laptop 3 15" Battery Replacement: crwdns2935265:00crwdnd2935265:01crwdnd2935265:03crwdne2935265:0 Microsoft Surface Laptop 3 15" Battery Replacement: crwdns2935265:00crwdnd2935265:02crwdnd2935265:03crwdne2935265:0 Microsoft Surface Laptop 3 15" Battery Replacement: crwdns2935265:00crwdnd2935265:03crwdnd2935265:03crwdne2935265:0
  • Take care not to puncture or bend the battery with your tools—a punctured or bent battery may leak dangerous chemicals or cause a thermal event.

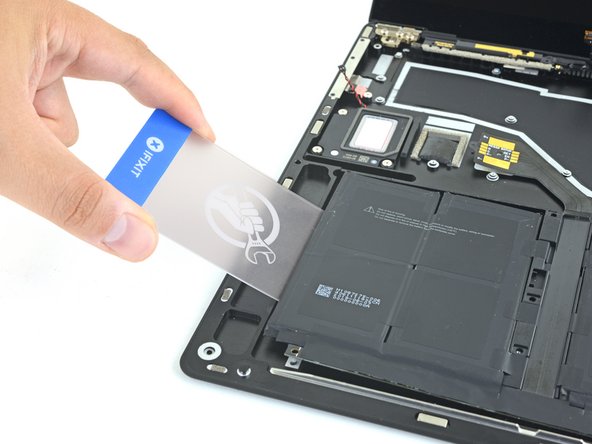
  • Slide a plastic card underneath the far left battery cell group to slice through the adhesive holding it to the case.

  • If you encounter significant resistance at any point during this procedure, pause and apply more adhesive remover. Wait for it to soak into the adhesive, and try again.

  • Wiggle the card from side to side as you insert it under the battery cells to fully separate all adhesive holding them in place.

  • Leave the plastic card temporarily underneath the cell to prevent it from re-adhering while you continue.

バッテリーをツールで穴を開けたり曲げたりしないように注意してください。穴を開けたり曲げたりすると、危険な化学物質が排出されたり、熱現象に伴う事故が発生する恐れがあります。

左端バッテリーセルのグループ下に、プラスチックカードをスライドさせて、ケースに固定されている接着剤を切開します。

この手順の途中で大きな抵抗を感じた場合は、一旦中断して粘着剤リムーバーを追加で塗布します。接着剤が染み込むのを待ってから、もう一度試してみてください。

カードを左右に揺らしながらバッテリーセルの下に差し込み、セルを固定している接着剤を完全に分離します。

プラスチックカードを一時的にセルの下に置いたままにして、再接着を防ぎながら次の作業に移ります。

crwdns2944171:0crwdnd2944171:0crwdnd2944171:0crwdnd2944171:0crwdne2944171:0