crwdns2933423:0crwdne2933423:0

Disassembling ASUS Eee pc 1008Ha

crwdns2935425:013crwdne2935425:0

crwdns2936315:0crwdne2936315:0
crwdns2936323:0crwdne2936323:0
crwdns2931653:013crwdne2931653:0
Disassembling ASUS Eee pc 1008Ha: crwdns2935265:00crwdnd2935265:01crwdnd2935265:03crwdne2935265:0 Disassembling ASUS Eee pc 1008Ha: crwdns2935265:00crwdnd2935265:02crwdnd2935265:03crwdne2935265:0 Disassembling ASUS Eee pc 1008Ha: crwdns2935265:00crwdnd2935265:03crwdnd2935265:03crwdne2935265:0
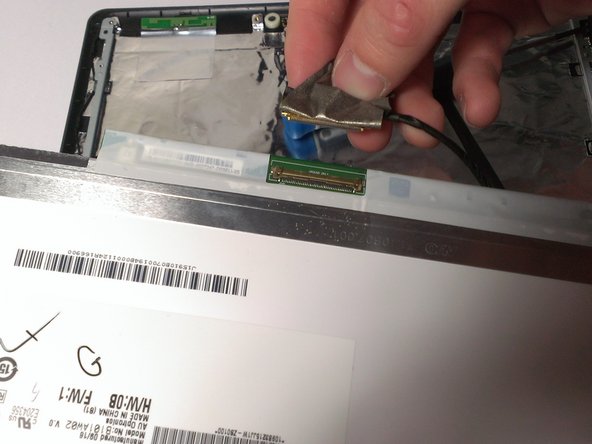
  • Use your fingers to remove the adhesive tape located on the back of the screen near the wire connection.

  • Disconnect the wire from the screen.

crwdns2935429:0crwdne2935429:0

crwdns2935429:0crwdne2935429:0

crwdns2944171:0crwdnd2944171:0crwdnd2944171:0crwdnd2944171:0crwdne2944171:0