crwdns2933423:0crwdne2933423:0

Playdateの分解

crwdns2936315:0crwdne2936315:0
crwdns2936323:0crwdne2936323:0
crwdns2931653:05crwdne2931653:0
Playdate Teardown: crwdns2935265:00crwdnd2935265:01crwdnd2935265:03crwdne2935265:0 Playdate Teardown: crwdns2935265:00crwdnd2935265:02crwdnd2935265:03crwdne2935265:0 Playdate Teardown: crwdns2935265:00crwdnd2935265:03crwdnd2935265:03crwdne2935265:0
  • In we go! We grab our big flathead driver for this most diminutive console, and twist away some screws.

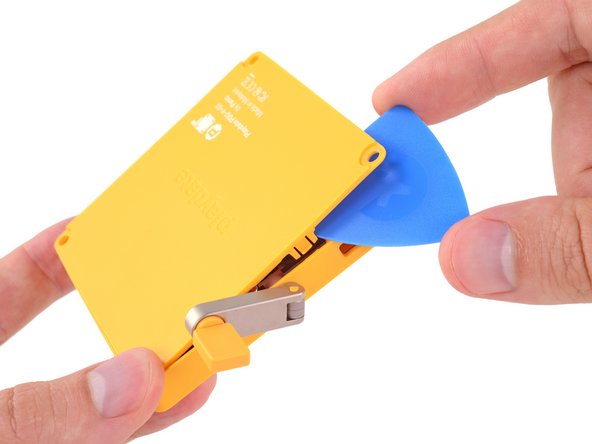
  • Next, a few plastic clips stand guard at the entry point. We're careful not to let any precious nostalgia escape while we wield our opening pick.

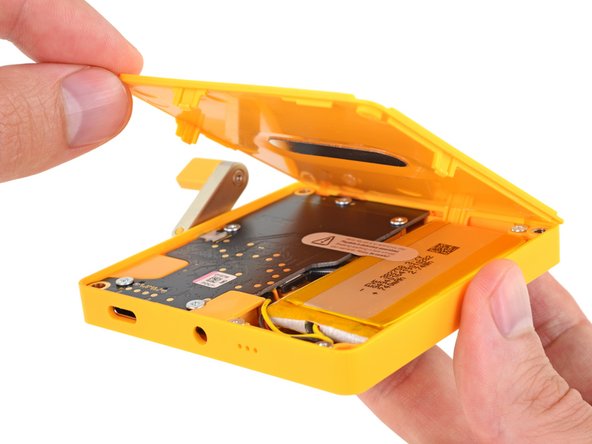
  • First look inside reveals: Tidiness. Yellowness. And an easily-accessible battery, a.k.a. repair happiness.

さて、いよいよ分解が始まります。この小さなゲームコンソール用に、大きなマイナスドライバーを手にとり、ネジを外していきます。

次に、プラスチック製クリップが開口部周辺に数個付いています。貴重なノスタルジアが逃げないように注意を払いながら、開口ピックを差し込みます。

内部が出てきました。その様子はきちんと整然としていて、実に黄色です。そしてアクセスしやすいバッテリー、別名リペアハピネスがあります。

crwdns2944171:0crwdnd2944171:0crwdnd2944171:0crwdnd2944171:0crwdne2944171:0